[Basics] Arduino Practice - LED Control
주피터 · 2019-09-03 · 6
Controlling a Single LED
① LED Component Description
An LED has a longer leg (+) and a shorter leg (-).
Since voltage flows from the positive pole to the negative pole, when configuring the circuit, connect the longer leg (+) to the positive pole of the power supply and the shorter leg (-) to the negative pole of the power supply.
* Characteristics
- An electronic component made by joining two types of semiconductors that emits light when current flows through it
- Low power consumption, high energy conversion efficiency, and long lifespan
- Longer leg: Anode, connect to (+) power supply
- Shorter leg: Cathode, connect to (-) power supply
- Does not allow current to flow in reverse polarity
- Operating current: 10 ~ 20mA
② Hardware Configuration
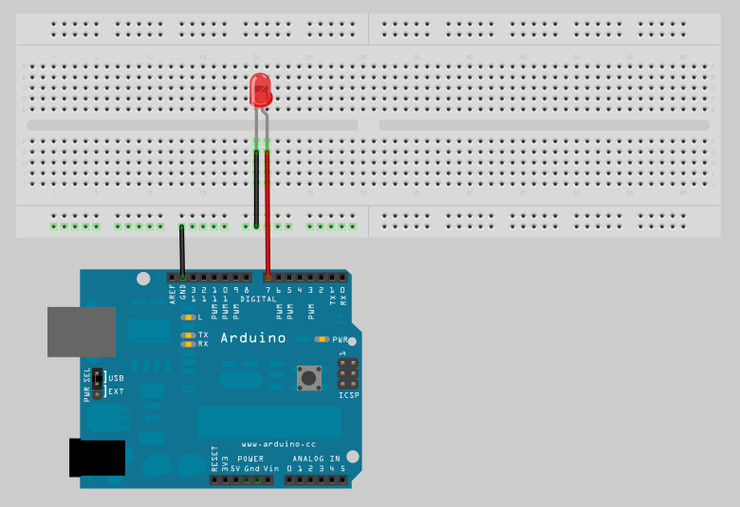
Configure the hardware as shown in the figure below.
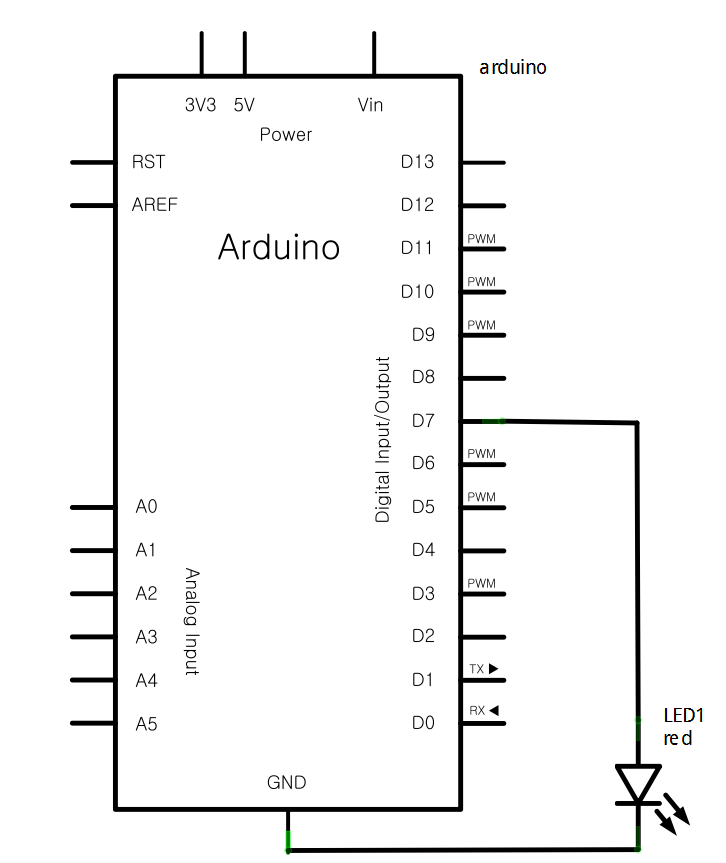
< Logic Circuit >
③ Arduino Programming
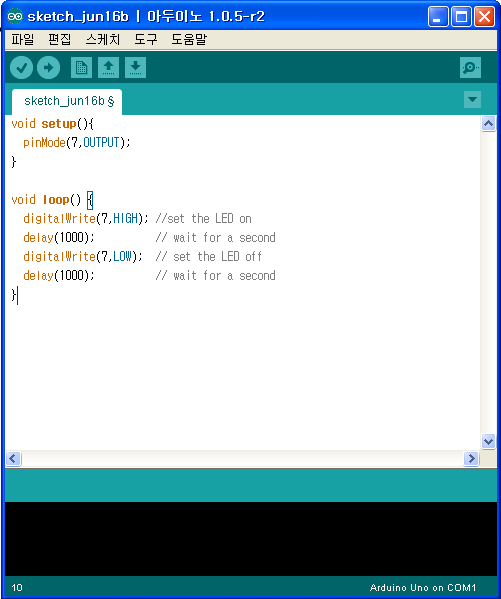
Implement the program logic.
The written program is converted to machine code to operate on the development board.
This is called "compile" in computer terminology, and
selecting that section will compile the code.
Once compiled, to test on the actual board, you need to upload the program to the CPU chip of the actual Arduino board using Upload.
After confirming that USB is connected,
select the button to download the program to the board.
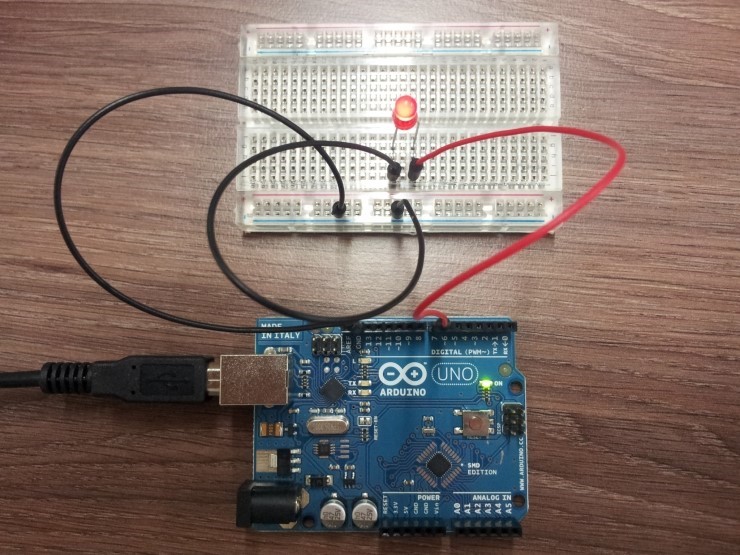
The figure below is an actual photograph of the system operating in real integration.
Configure the board as shown below and check the result. The LED will turn off and on at one-second intervals.
6
댓글 4개
- yoom등록해봐요
- yoom등록해봐요
- yoom등록해봐요
- 가리비ㅁㄴㅇㅎ