

라즈베리파이 GPIO Web Control
네오즈 · 2019-09-30 · 7
1. GPIO Web Control 테스트 회로 구성
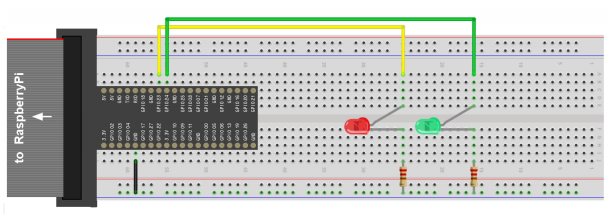
( GPIO 출력 테스트에 사용했던 LED 점등회로를 네트워크를 통해 Web페이지를 통해 제어한다. )
Red Led : GPIO 23번 연결, Green Led : GPIO 24번 연결
2. Node.js 및 Express.js설치
Node.js 바이너리 저장소 등록.

Node.js 설치.

Node.js 설치 확인.

NPM 설치 확인.

Express.js 설치.

3. Express.js를 이용한 LED 제어 Node 작성
‘\--ejs’옵션으로 Express.js 노드 어플리케이션 ‘led’ 설치.

생성된 ‘led’ 노드 어플리케이션 폴더로 작업경로 변경.

생성된 ‘led’ 노드 어플리케이션이 의존하는 모든 노드 패키지를 설치.

라즈베리파이 GPIO 출력 노드 ‘onoff’ 설치.

app.js
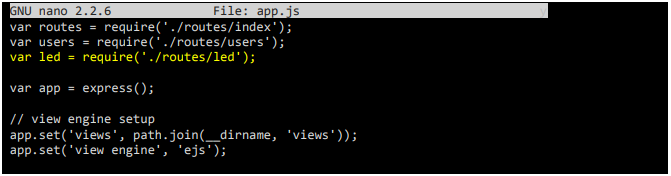
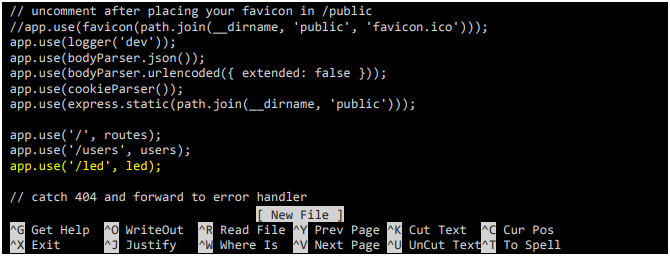
생성된 led 노드 어플리케이션 폴더의 app.js 편집.

아래 노란색으로 표시한 2행을 추가한다.
led.js
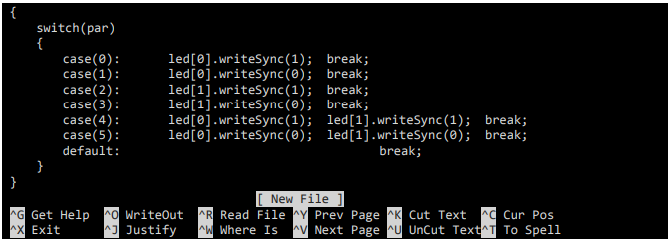
routes 폴더에 led.js 작성

다음 내용 작성.
.png)
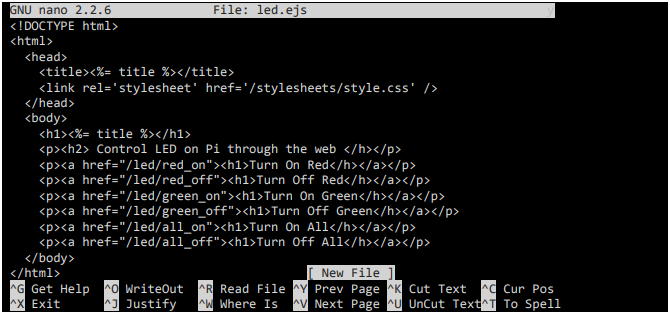
led.ejs
public/views 폴더에 led.ejs 작성.

다음 내용 작성.
4. Node 동작 Test
LED 제어 웹 페이지 구동.

LED 제어 웹 페이지 URL은 다음과 같이 구성된다.

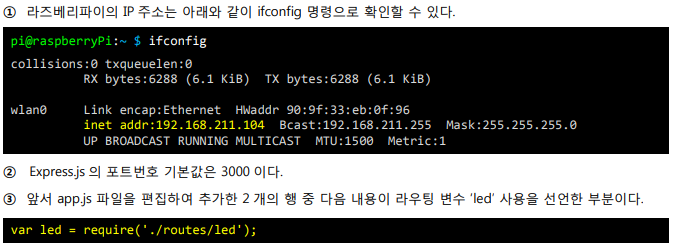
따라서 LED 제어 웹 페이지 URL은 이번 예에서는 “http://192.168.211.104:3000/led” 이다. 이 URL을 아래 그림과 같이 라즈베리파이 와 같은 네트워크에 연결된 PC, 스마트 폰 등의 웹 브라우저로 연다.
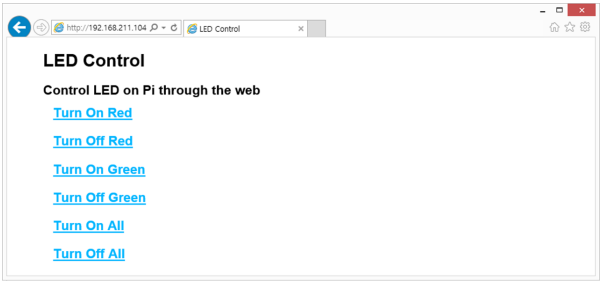
웹 페이지의 하이퍼링크( Turn On Red, Turn Off Red, … ) 를 클릭하여 라즈베리파이 에 연결된 LED가 제어되는 것을 확인 한다.
7
댓글 0개
등록된 댓글이 없습니다.