[ Fundamentals ] Arduino Practice - Making a Digital Thermometer

주피터 · 2019-10-28 · 5
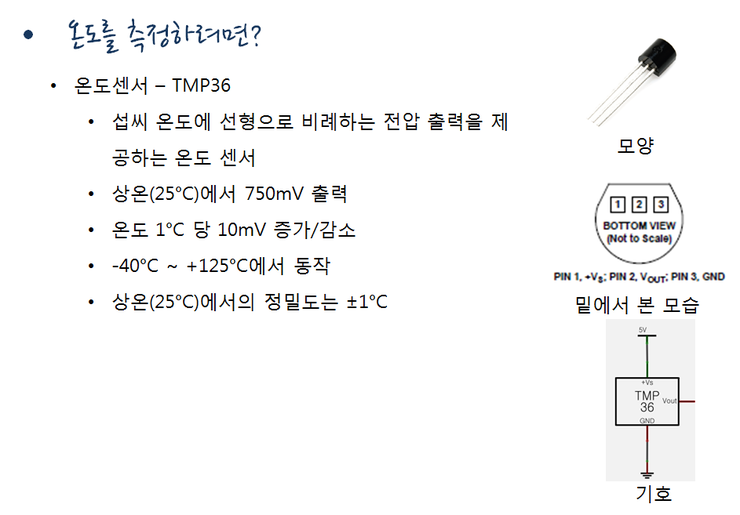
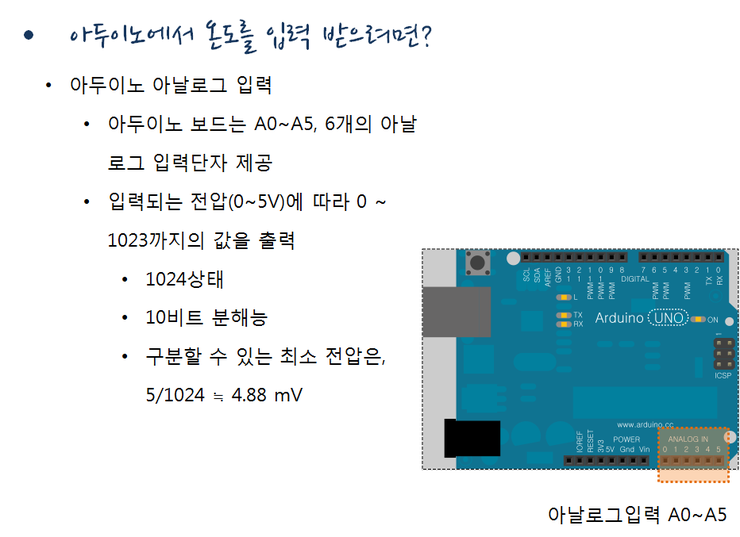
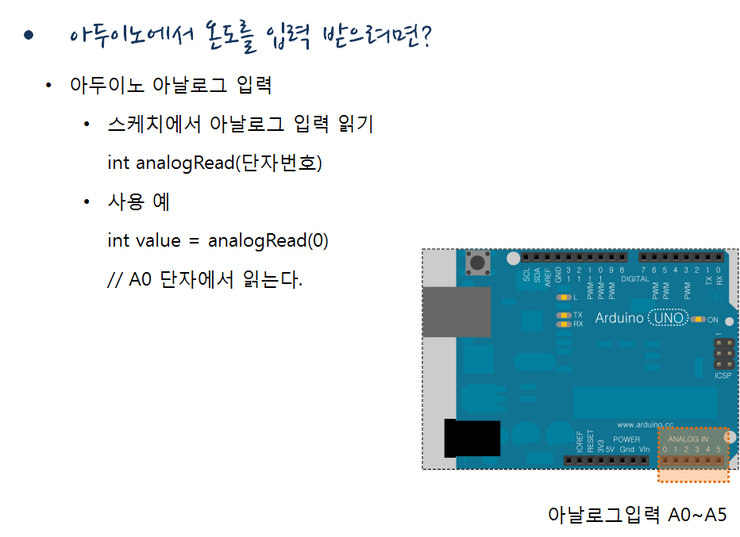
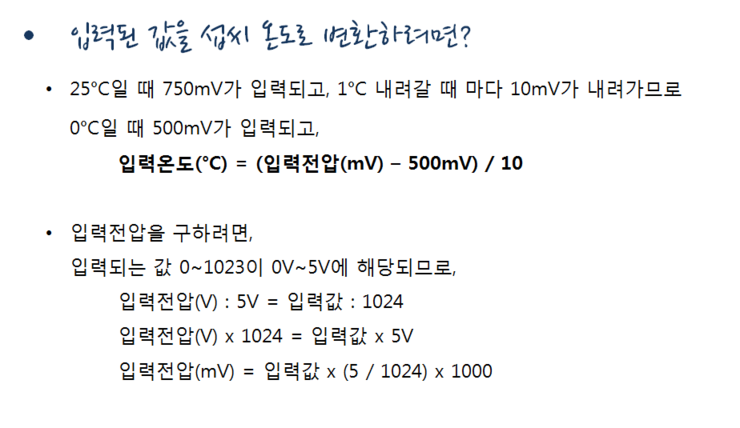
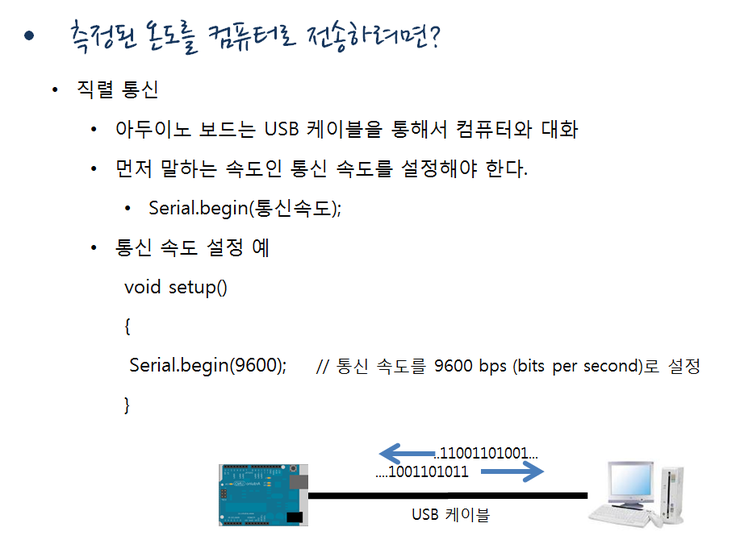
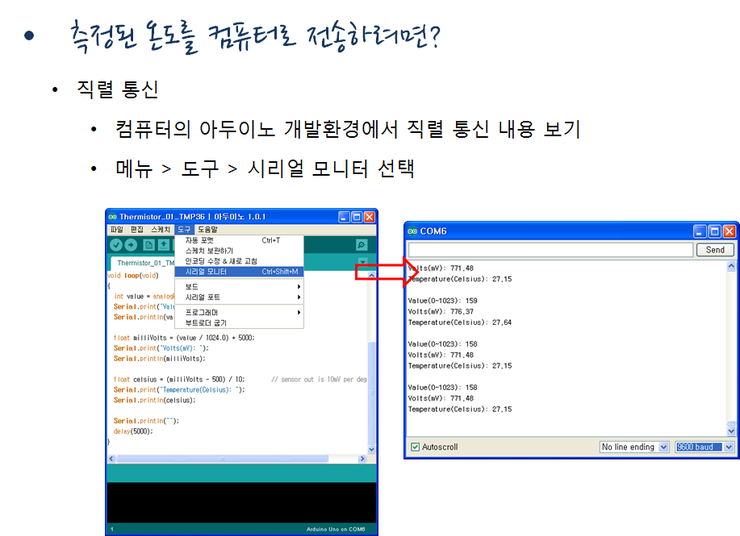
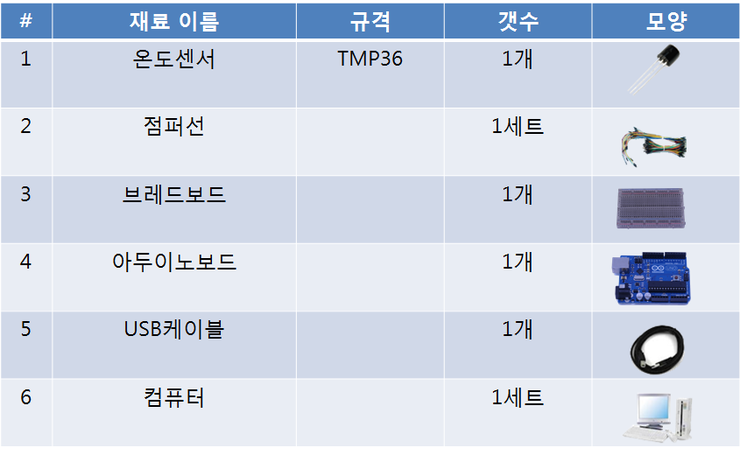
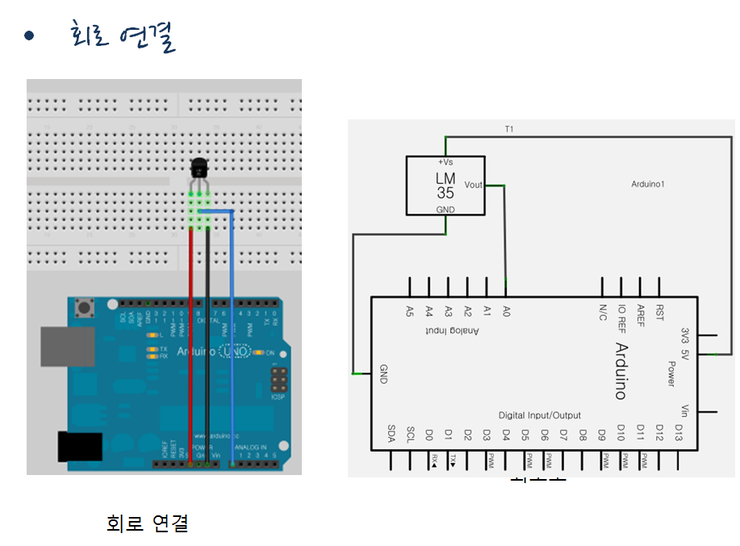
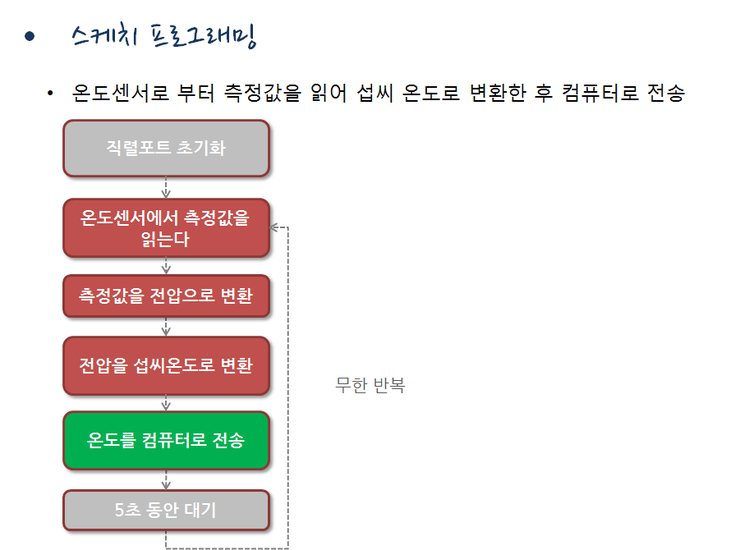
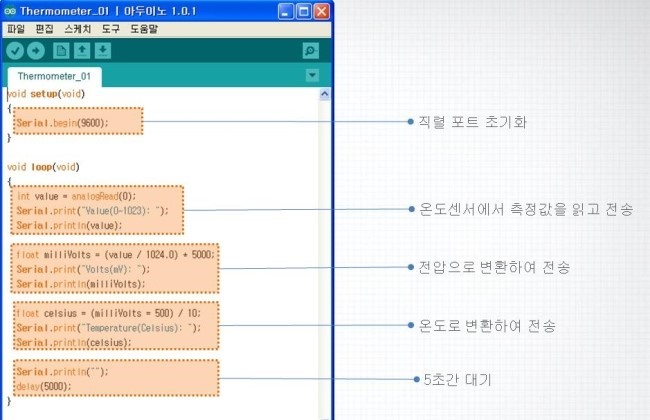
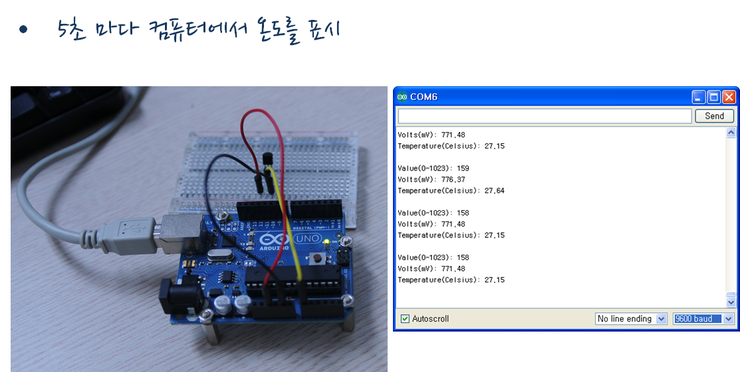
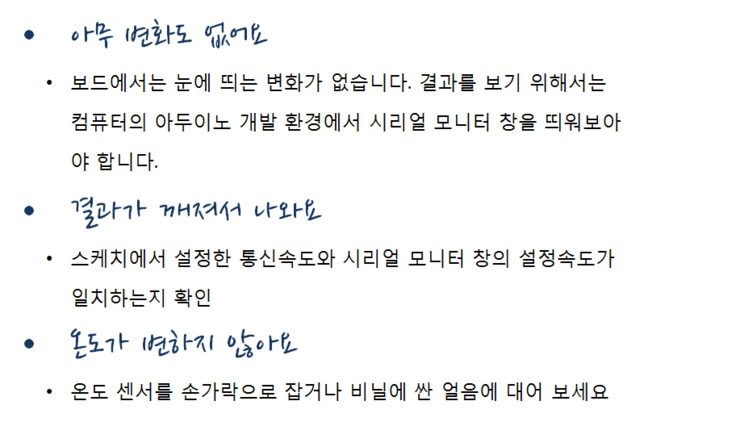
① To measure temperature, a thermometer is required. However, a thermometer can only have its measured values confirmed by the human eye. If there is a device that measures temperature and converts it into an electrical signal, it becomes easy to process using a palm computer. The electronic component that performs this role is called a temperature sensor. Let us learn about temperature sensors. Temperature sensor appearance, bottom view, symbol image. The temperature sensor has three leads. When 5V voltage is connected to the first lead and 0V to the third lead, the second lead outputs the measured temperature value as a change in voltage. Room temperature, which is approximately 25 degrees Celsius that we can ordinarily experience in daily life, causes the temperature sensor to output 750mV. Furthermore, whenever the temperature rises or falls by 1 degree Celsius, 10mV rises or falls accordingly. ⓞ Image showing the analog input terminals of the Arduino board If the output of the temperature sensor is read as a digital input in the Arduino, digital input can only recognize two states: low when the input value is 0 volts, and high when it is 5 volts. Therefore, the temperature measured by the temperature sensor must be read using an analog input that can read analog voltage, not digital input. The Arduino board has 6 analog input terminals from A0 to A5. When a voltage of 0V to 5V is applied to the analog input terminal, it outputs values from 0 to 1023 accordingly. If 0 is input, the input voltage is 0 volts; if 1023 is input, the input voltage is 5 volts; if the middle value of 512 is input, the input voltage is 2.5 volts. The minimum unit of voltage that can be determined by Arduino is found by dividing 5 volts by 1024, so the minimum voltage that the Arduino's analog input can distinguish is 4.88mV. This is called "resolution" in technical terms. Since 1024 can be expressed using 10 bits in binary, it is said to have "10-bit resolution." ⓞ Screenshot of the Arduino board with analog input terminals indicated To read input values from the analog terminal, in the actual sketch, the method of receiving analog input is to call the analogRead() function and write the terminal number you wish to read inside the parentheses. The analogRead() function reads the voltage of the given terminal and returns the resulting value as an integer based on the voltage. ⓞ Explanation of the process for converting to Celsius To convert the value input through the temperature sensor to Celsius, considering the facts learned from examining the characteristics of the temperature sensor: the temperature sensor outputs 750mV at 25 degrees Celsius, and whenever the temperature rises or falls by 1 degree Celsius, 10mV rises or falls accordingly. Therefore, at 0 degrees Celsius, 500mV is output, and since a change in input voltage of 10mV corresponds to a temperature change of 1 degree Celsius, you can obtain the input temperature by subtracting 500mV from the input voltage and dividing by 10. The input voltage can be calculated as follows: the value coming through analog input is 0 to 1023 according to 0 to 5 volts, so multiply the input value by 5, divide by 1024, and multiply by 1000 to convert to millivolt units. To transmit the determined temperature to a computer, there may be various methods, but the easiest method is to use serial communication. Just as the sketch you wrote is uploaded to the Arduino board through a USB cable, with serial communication between the Arduino board and computer as shown in the image, data can be exchanged between the sketch running on the Arduino board and the Arduino development environment on the computer through the USB cable. Because data transmitted through the USB cable is transmitted sequentially one after another, it is called serial communication or serial communication. To perform serial communication, the speed at which both parties exchange data must be specified equally. In the sketch, you can specify the communication speed using the Serial.begin() function. In the Arduino development environment, you can specify the speed at the bottom right of the serial monitor window. The letters B.A.U.D written after the number representing the speed is a unit indicating the data transmission rate. It indicates how many bits of data are transmitted per second. ⓞ List of required materials To construct a digital thermometer using a temperature sensor, you need one temperature sensor, one breadboard to connect components, one set of jumper wires to connect components, one Arduino board, one USB cable to connect the Arduino board and computer, and one personal computer set. ⓞ Circuit configuration and circuit diagram ⓞ Sketch flowchart ⓞ Temperature sensor sketch In the setup() function, the Serial.begin() function is called to initialize the serial port at 9600 baud. Next, in the loop() function, first, an integer variable value is declared and the analogRead() function is called to receive measured values from terminal A0. To verify the input value, the Serial.print() function is called to transmit the input value. The Serial.println() function transmits the value in the parentheses via serial communication like the Serial.print() function, but differs in that a line feed character is added at the end. Next, the input value is converted to voltage in millivolt units. Again, to verify the converted value, it is transmitted via serial communication. Next, the voltage is converted to temperature. Similarly, the converted value is transmitted via serial communication. The delay(5000) function is called again to wait for 5 seconds. This process is repeated infinitely. ⓞ Completed photo When executed on the Arduino board, now every 5 seconds, the value input from the temperature sensor, the value converted to voltage, and the temperature are displayed in the serial monitor window. When you hold the temperature sensor with your hand, you can see the temperature rise. When you release your hand from the temperature sensor, the temperature decreases again in this way. ⓞ Error case If there is no change in the Arduino board, to see the results, you must open the serial monitor window from the Arduino development environment on the computer. When the results appear corrupted, the text becomes corrupted when the communication speed set in the sketch and the setting speed in the serial monitor window are different. Set the communication speed of the serial monitor window to match the speed specified in the sketch. ``` void setup(void) { Serial.begin(9600); } void loop(void) { int value = analogRead(0); Serial.print("Value(0-1023): "); Serial.println(value); float milliVolts = (value/1024.0) *5000; Serial.print("Volts(mV): "); Serial.println(milliVolts); float celsius = (milliVolts = 500)/10; Serial.print("Temperature(Celsius): "); Serial.println(celsius); Serial.println(""); delay(5000); } ```
5
댓글 0
등록된 댓글이 없습니다.