

Raspberry Pi Pico W를 이용한 IoT Platform 데모
사용 기술
콘테스트 프로젝트 진행 상황
각 Quest를 단계적으로 완성하는 프로젝트입니다.
Quest 1: Raspberry Pi Pico W를 이용한 IoT Platform 데모
2022.08.06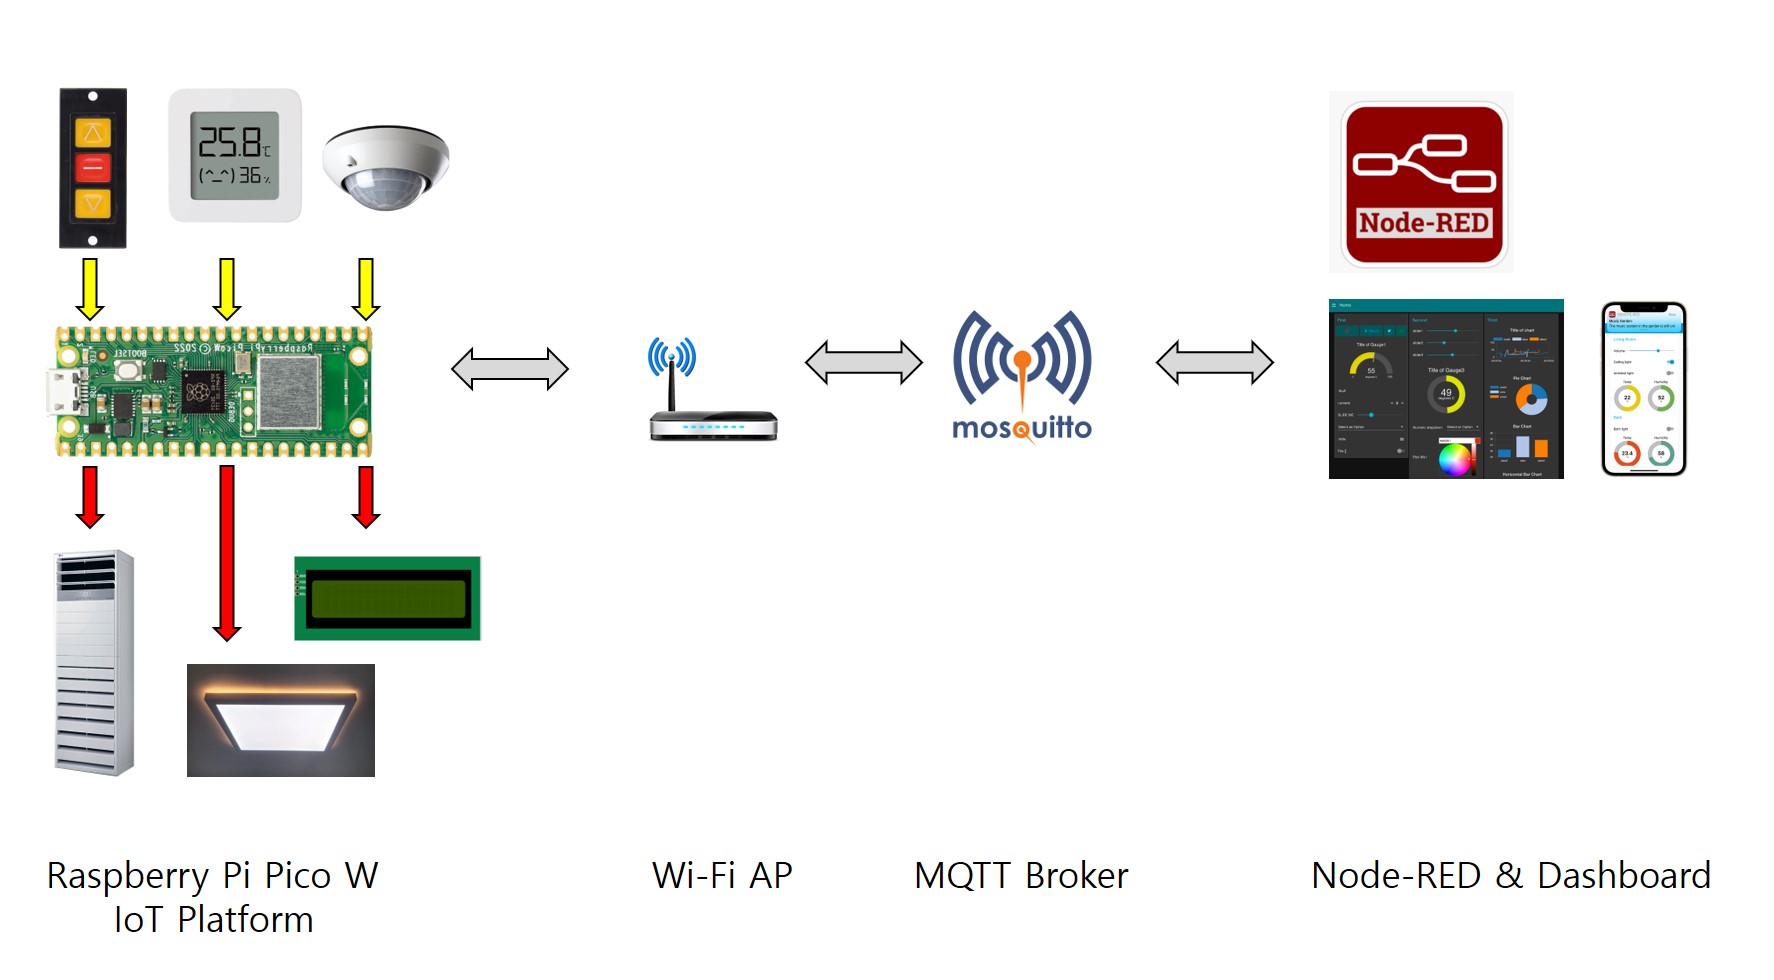
□ 아이디어 소개 및 개요 (개발 계획 및 과정 포함)
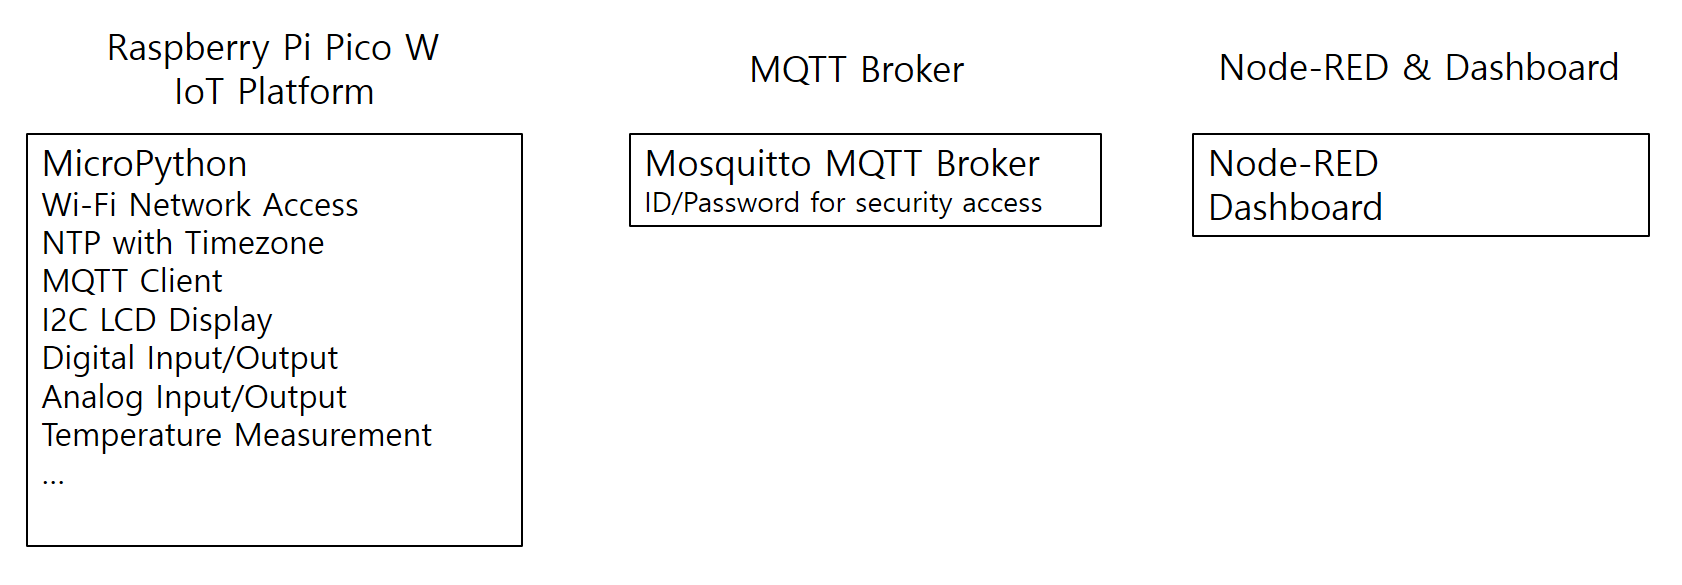
Raspberry Pi Pico W의 WiFi 기능을 사용하여 기본적인 IoT 플랫폼 데모 구현
IoT의 보편적인 응용예를 보이기 위해 각종 센서 입출력을 이용한 Room Control Unit을 구현하기로 함
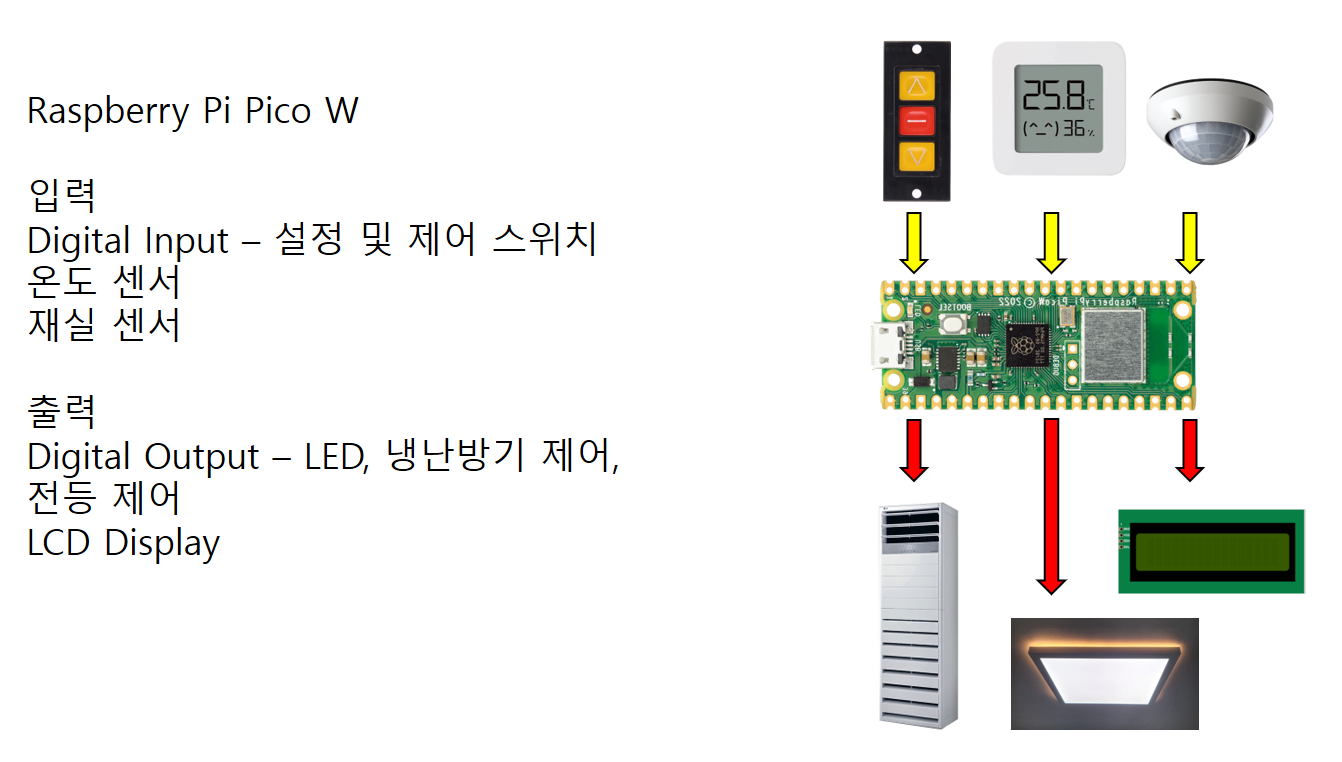
1. 온도 제어 - Pico W의 내장 온도센서를 이용한 온도 측정, 설정 온도에 따른 냉/난방 제어
2. 재실 센서 - 재실 센서를 이용한 재실 상태 확인 및 전등 On/Off 자동 제어, 현재의 전등 On/Off 상태 모니터링, 원격지에서 전등 On/Off 제어 기능
3. GPIO - 온도 설정 및 전등 On/Off를 수동 제어 할 수 있도록 버튼 입력 기능
4. I2C LCD 디스플레이 - 현재 시간, 각종 입출력 상태 표시 및 원격지에서 임의의 메시지 표출 기능
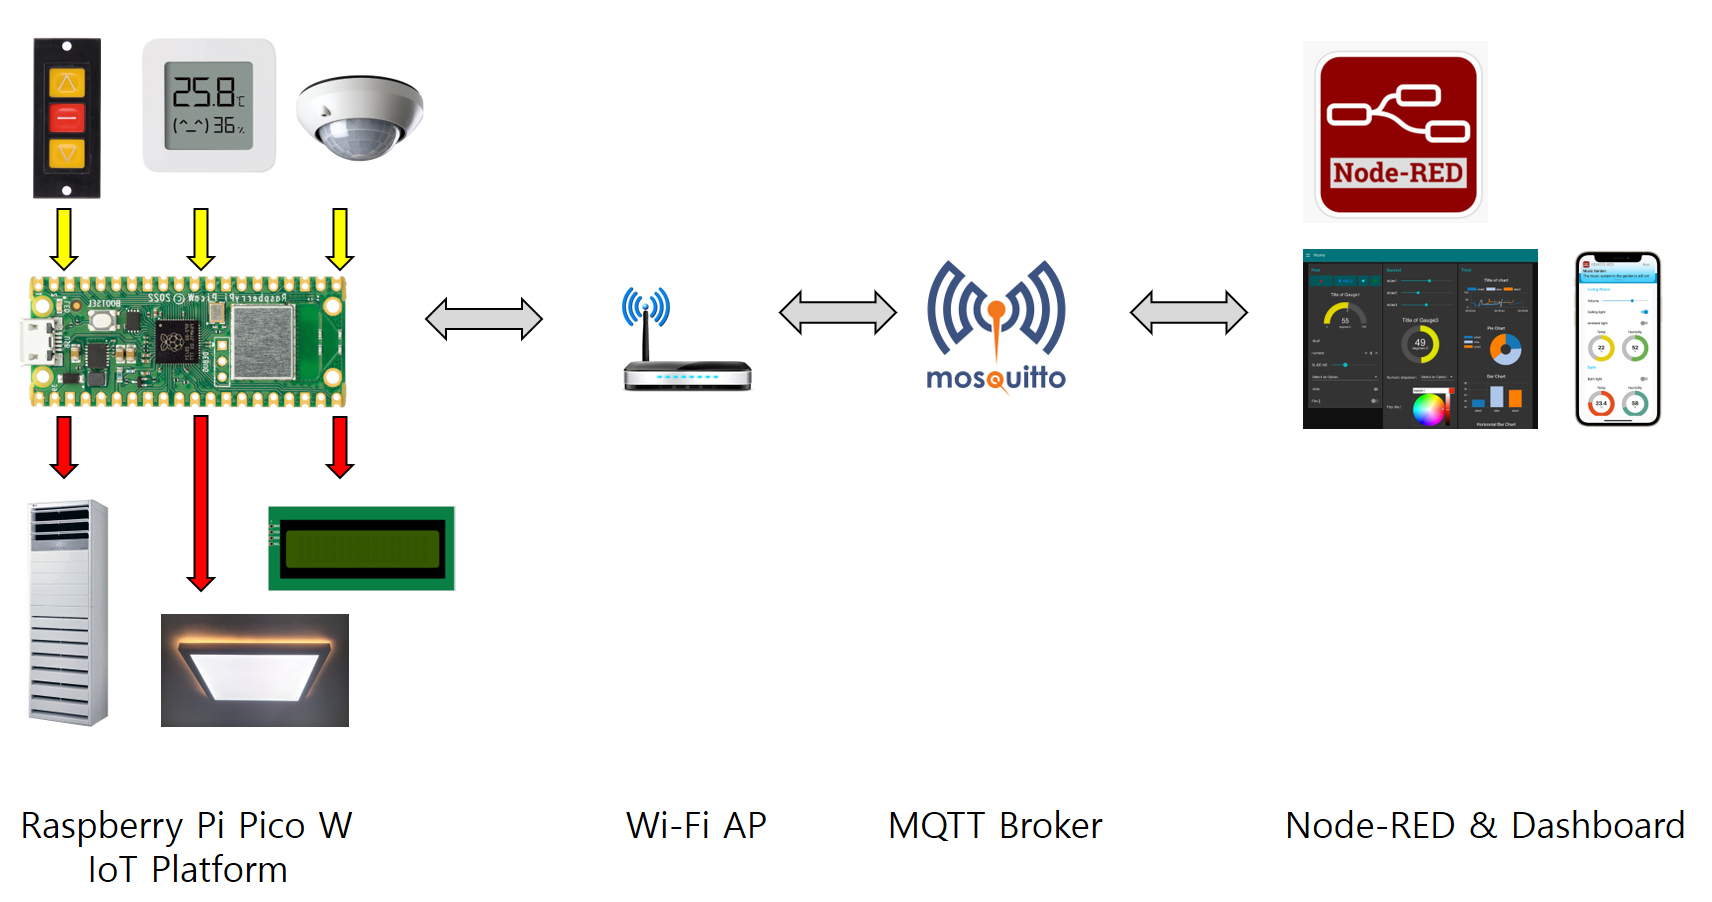
5. MQTT Broker와 Node-RED, dashboard를 이용하여 전체 상황 모니터링 및 원격지 제어
추후 확장 기능으로 Power Meter를 이용한 전력소모 로깅 검토
□ 전체 구조를 표현하는 블록 다이어그램
□ 하드웨어 구성 다이어그램
□ 소프트웨어 구성 다이어그램
Quest 2: Quest 2 개발 환경 구성
2022.08.28Raspberry Pi Pico W의 개발환경으로 MicroPython과 Thonny IDE를 사용하기로 합니다.
1. MicroPython Firmware Download
https://micropython.org/download/rp2-pico-w/ 에 접속하여 최신 firmware 를 다운로드 합니다. 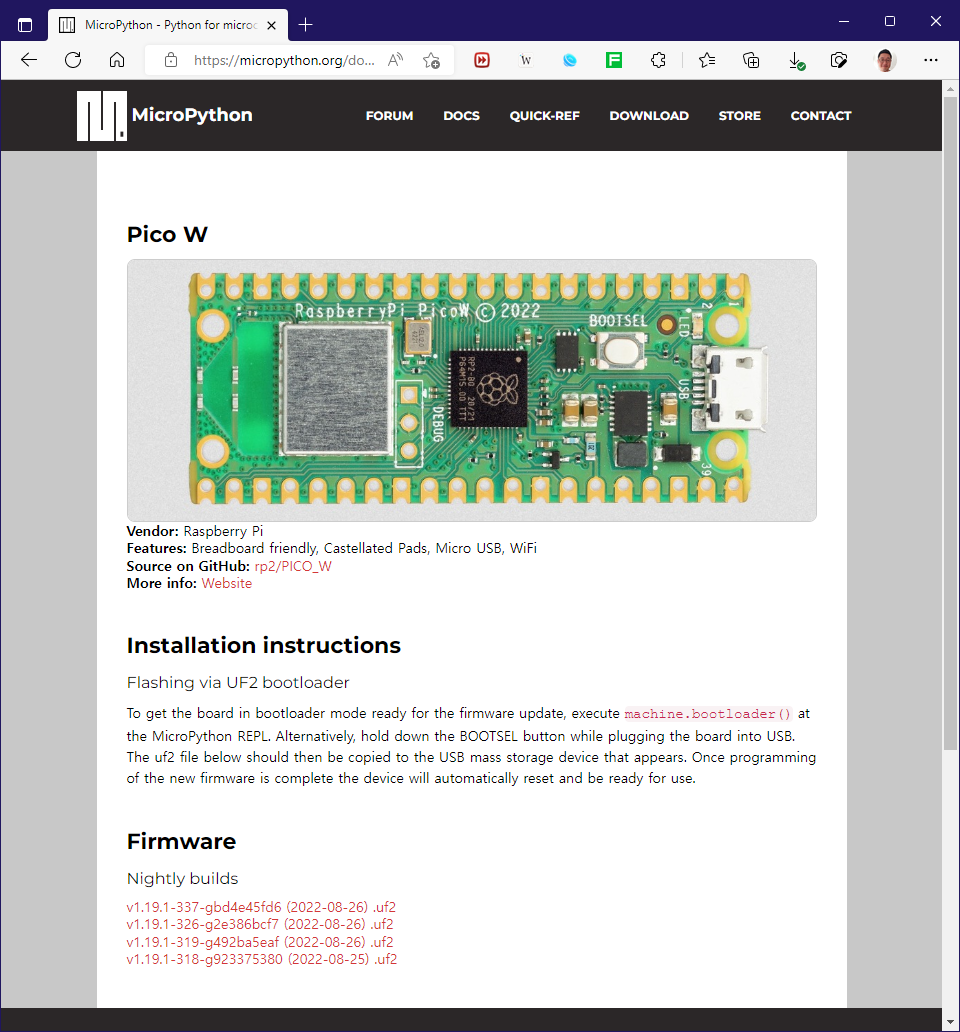
2. Firmware Upload
Pico W의 BOOTSEL 버튼을 누르고 있는 상태에서 USB케이블을 PC에 연결하면 가상 드라이브가 생성됩니다.
생성된 가상 드라이브에 1번 과정에서 받은 uf2 파일을 복사하면 펌웨어 업로드가 진행됩니다.
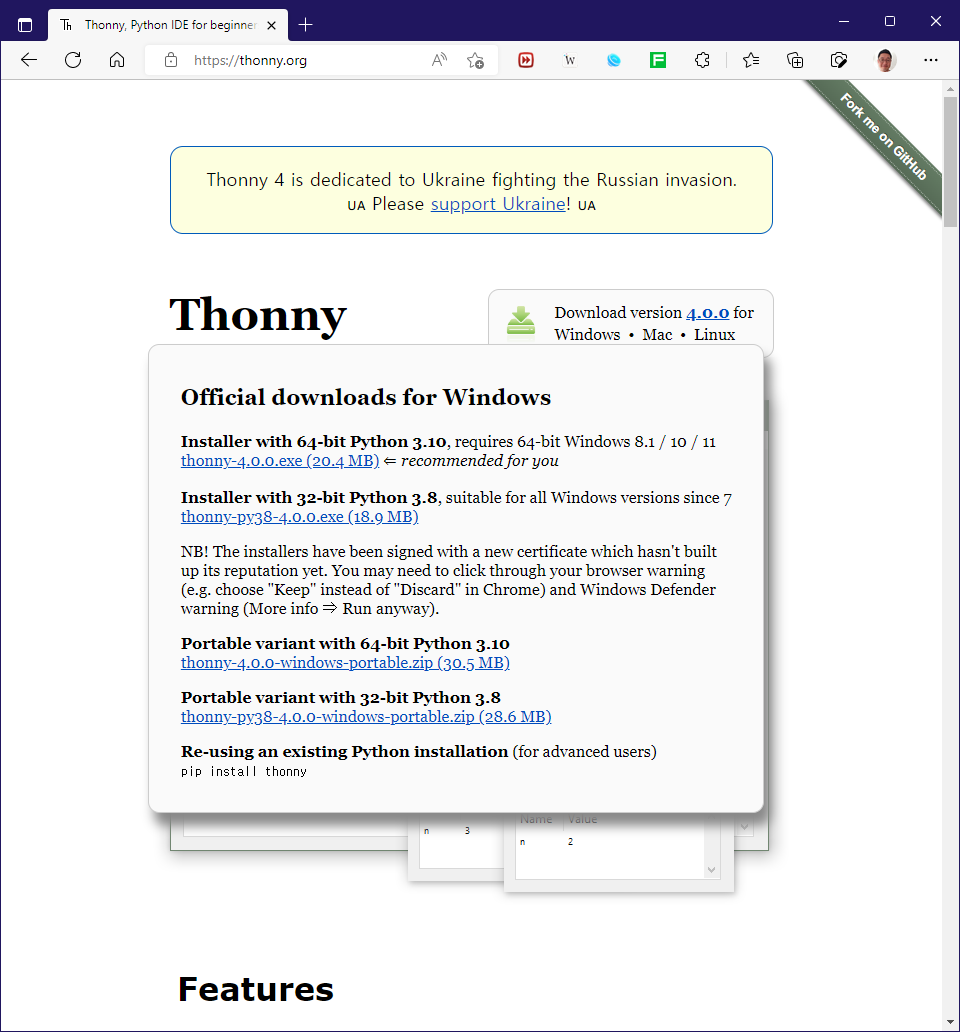
3. Thonny IDE 설치
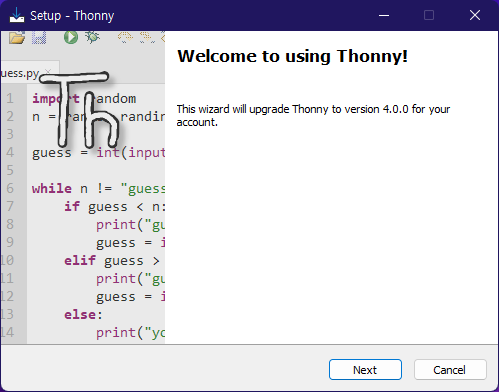
https://thonny.org/ 에서 Thonny 설치 파일을 다운로드 하고 설치 합니다.
4. Thonny IDE에서 MicroPython 설정
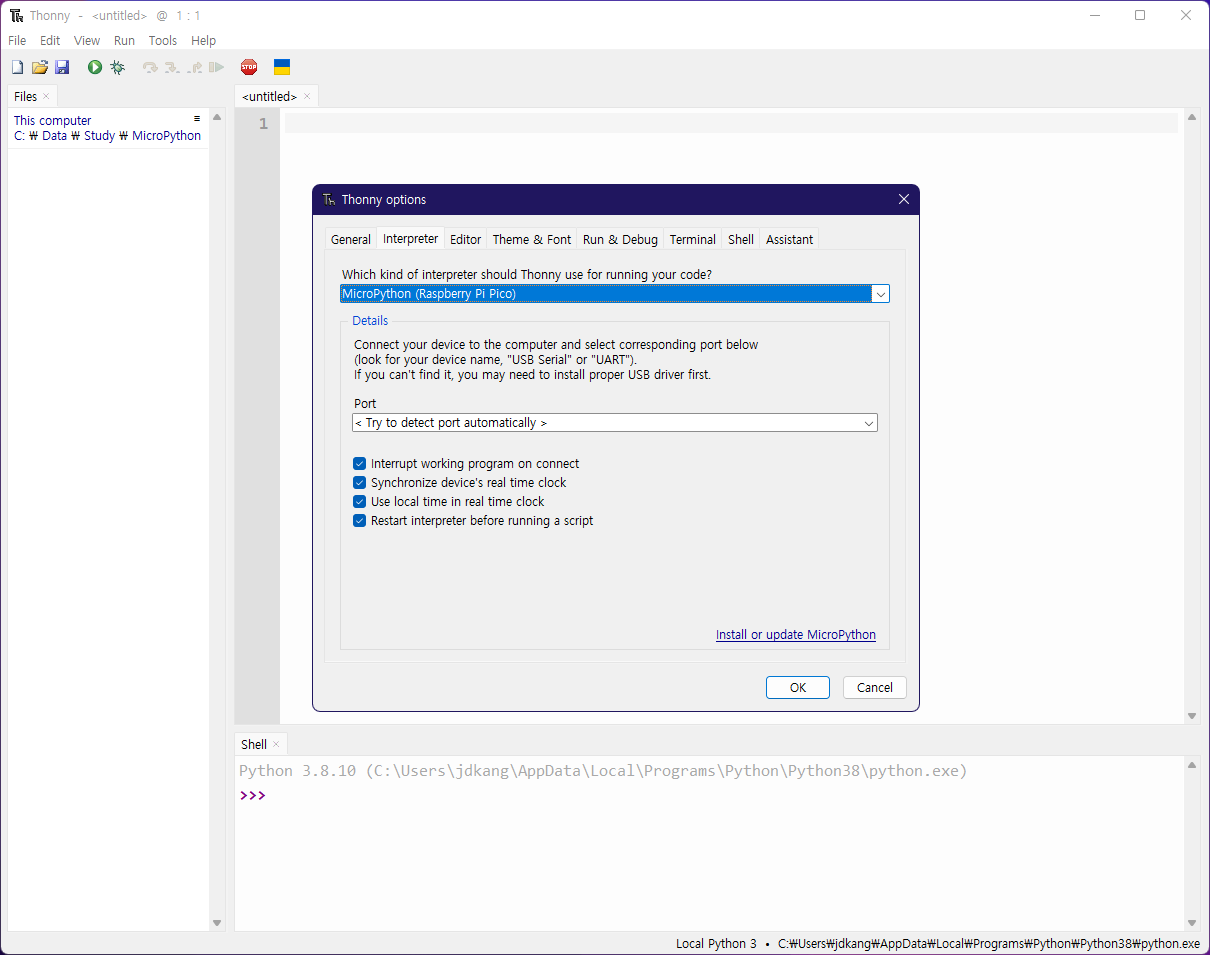
Thonny Tools -> Options -> Interpreter 탭에서 MicroPython (Raspberry Pi Pico)를 선택합니다.
5. MicroPython 동작확인
간단한 blink 예제등을 통해 동작을 확인 합니다.
from machine import Pin
import time

led = Pin('LED', Pin.OUT)

while True:
    led.on()
    time.sleep(1)
    led.off()
    time.sleep(1)
6. IoT 환경은 Oracle Cloud를 사용할 예정입니다.
Oracle Cloud에 가입하고 Compute Instance를 생성합니다. (설치과정 단계가 많으므로 Cloud 가입 및 설정 관련 자료를 참고하시기 바랍니다.)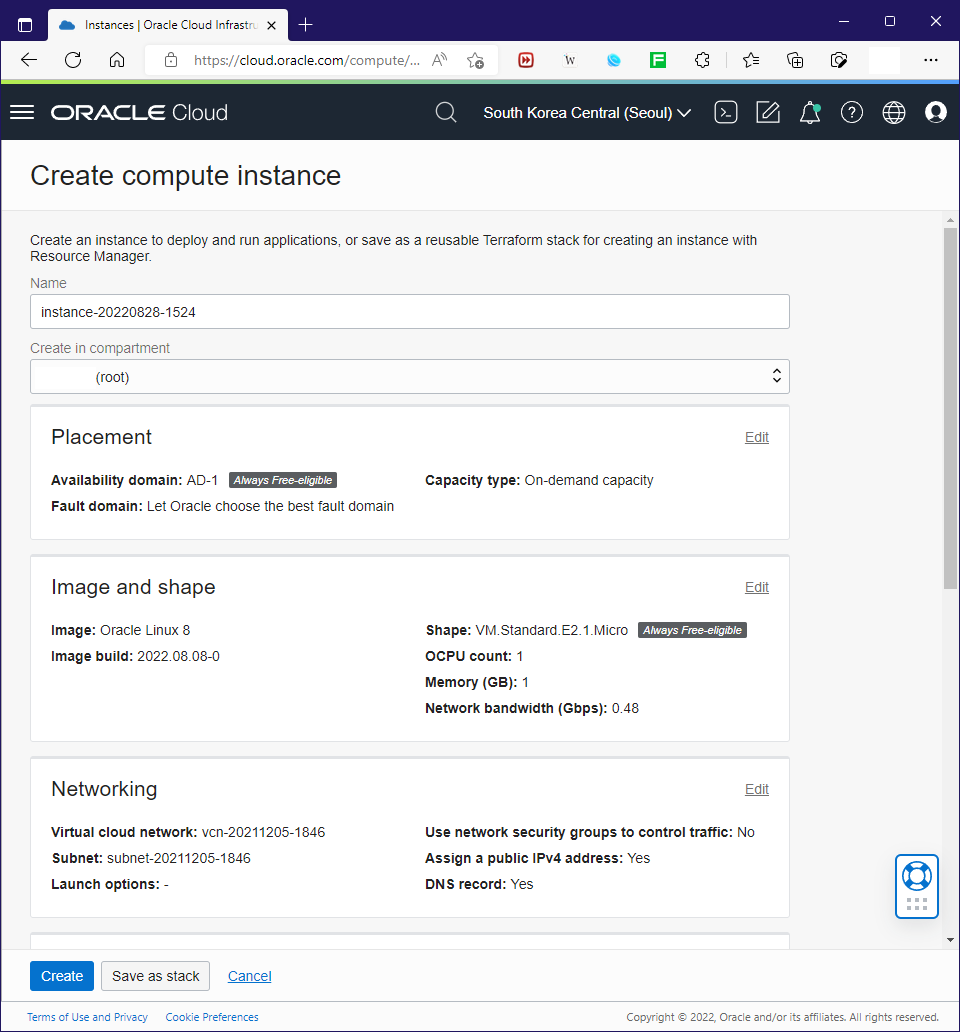
7. Cloud Compute에 Login 한 후 mosquitto broker, node.js, node-RED등 필요한 IoT 서버들을 설치합니다.
> which mosquitto
/usr/sbin/mosquitto
> mosquitto --help
mosquitto version 1.6.9

mosquitto is an MQTT v3.1.1 broker.

Usage: mosquitto [-c config_file] [-d] [-h] [-p port]

 -c : specify the broker config file.
 -d : put the broker into the background after starting.
 -h : display this help.
 -p : start the broker listening on the specified port.
      Not recommended in conjunction with the -c option.
 -v : verbose mode - enable all logging types. This overrides
      any logging options given in the config file.

See http://mosquitto.org/ for more information.
> node -v
v16.17.0
> node
Welcome to Node.js v16.17.0.
Type ".help" for more information.
>
(To exit, press Ctrl+C again or Ctrl+D or type .exit)
>
>
> node-red
28 Aug 15:31:05 - [info]

Welcome to Node-RED
===================

28 Aug 15:31:05 - [info] Node-RED version: v3.0.2
28 Aug 15:31:05 - [info] Node.js  version: v16.17.0
28 Aug 15:31:05 - [info] Linux 5.13.0-1036-oracle x64 LE
28 Aug 15:31:07 - [info] Loading palette nodes
28 Aug 15:31:09 - [info] Settings file  : /home/ubuntu/.node-red/settings.js
28 Aug 15:31:09 - [info] Context store  : 'default' [module=memory]
28 Aug 15:31:09 - [info] User directory : /home/ubuntu/.node-red
28 Aug 15:31:09 - [warn] Projects disabled : editorTheme.projects.enabled=false
28 Aug 15:31:09 - [info] Flows file     : /home/ubuntu/.node-red/flows.json
28 Aug 15:31:09 - [info] Creating new flow file
28 Aug 15:31:09 - [info] Server now running at http://127.0.0.1:1880/
28 Aug 15:31:09 - [info] Starting flows
28 Aug 15:31:09 - [info] Started flows
프로젝트 갤러리
프로젝트 제작 과정과 최종 결과물을 담은 이미지 갤러리입니다.
mqtt, node-red가 눈에 띄이네요.. 과정이 궁금하네요..