

콘테스트 프로젝트 진행 상황
각 Quest를 단계적으로 완성하는 프로젝트입니다.
Quest 1: 학습 자세 도우미 프로젝트
2022.05.13
본 프로젝트는 자녀의 학습 자세 및 환경을 모니터링하고
자세를 바로잡는 장치를 만드는 것입니다.
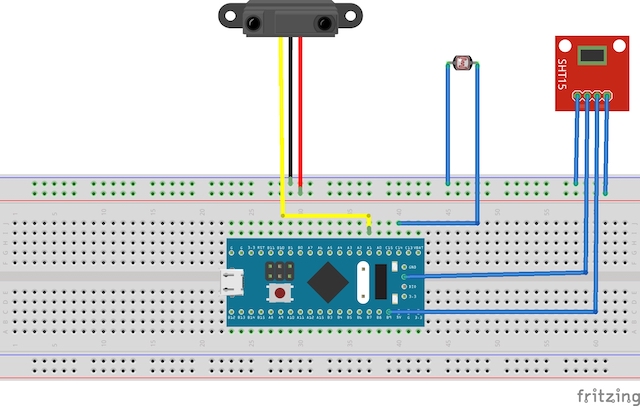
1. TOF 센서를 사용하여 책상과 자녀의 거리를 측정 합니다.
2. 조도 센서를 이용하여 공부 환경에 대한 모니터링을 합니다.
3. 온도 습도 센서를 이용하여 자녀 방의 온도 및 습도를 모니터링 합니다.
주기적으로 측정하여 자녀의 학습 상태가 최적일 환경을 안내해 주는 것이 본 프로젝트의 목표입니다.
하드웨어 설계 파일
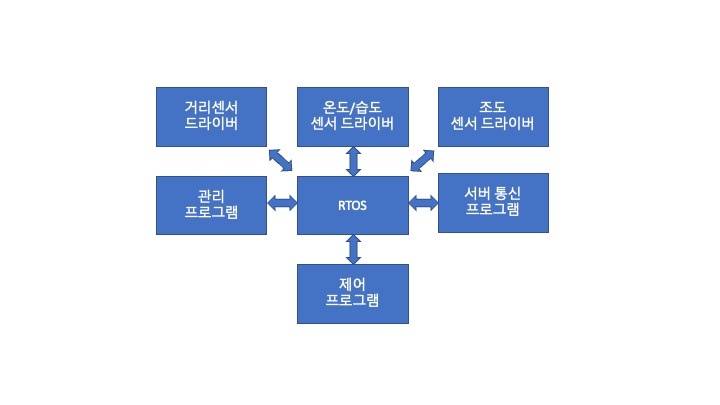
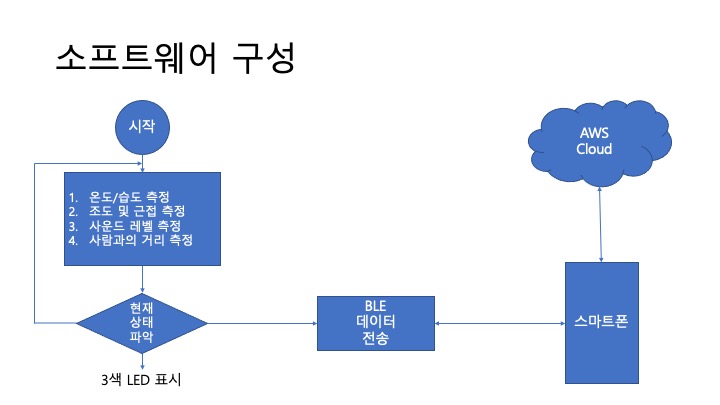
소프트웨어 다이어그램
Quest 2: 학습 자세 도우미 프로젝트 - Quest 2
2022.06.11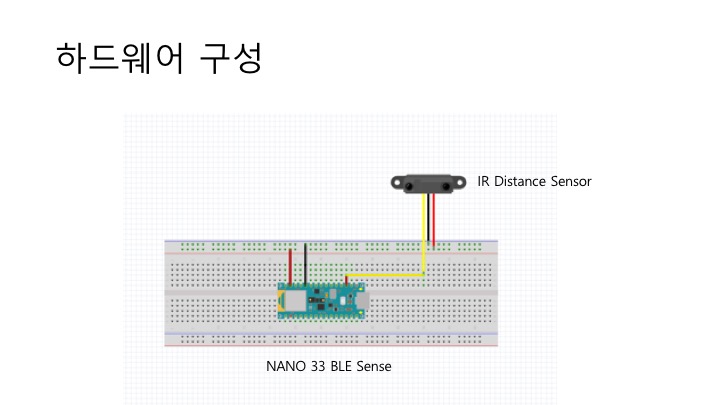
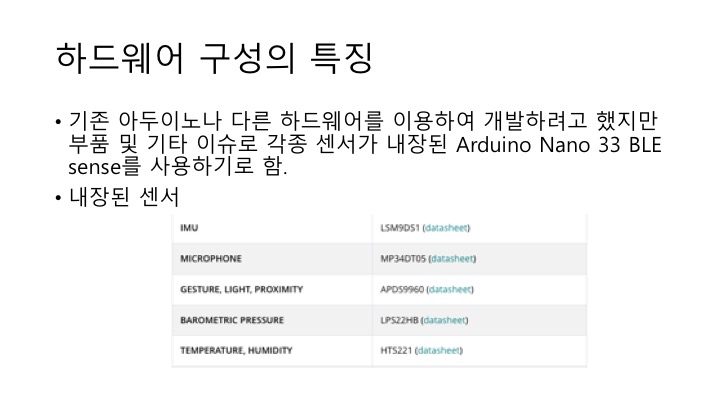
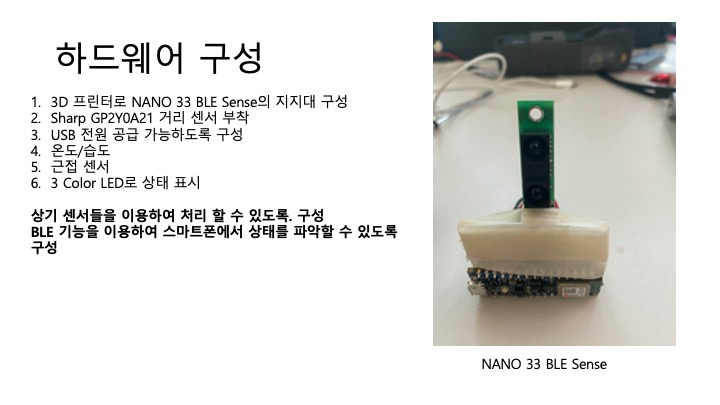
1. 하드웨어 구성 : 아두이노 나노 33 BLE Sense를 활용하여 내장 센서 및 크기를 작게 구성하였다.
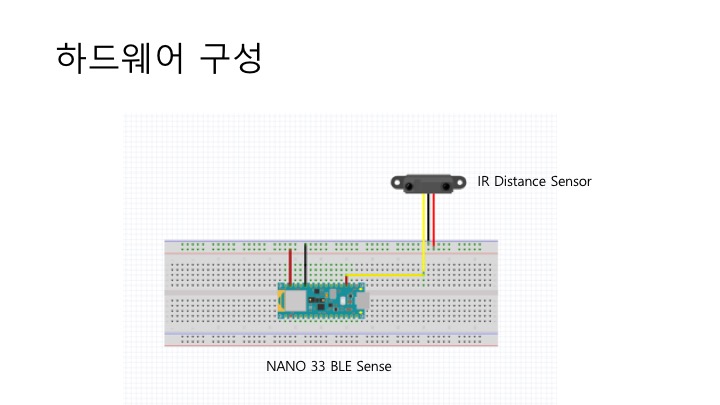
2. 하드웨어 구성의 특징
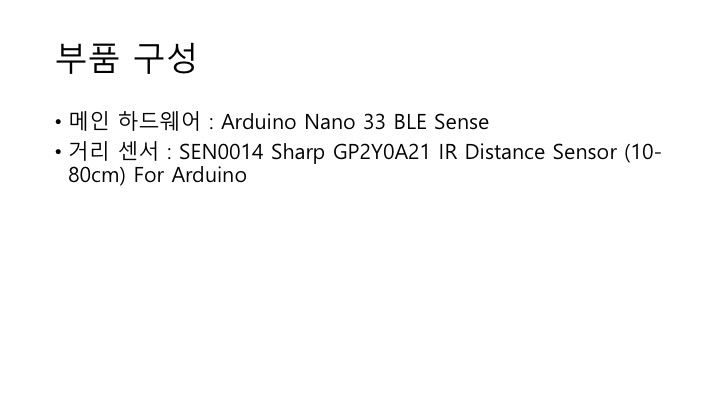
3. 부품 구성
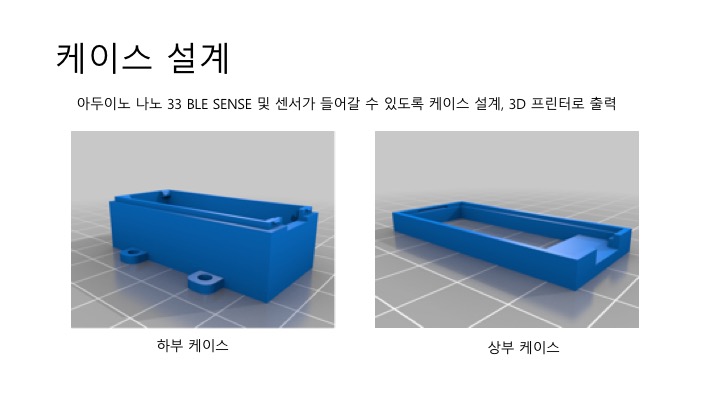
4. 케이스 설계
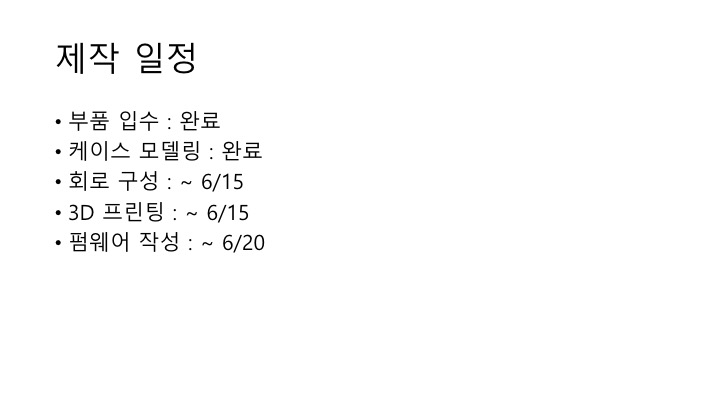
5. 제작 일정
Quest 3: 스마트 룸 프로젝트
2022.06.25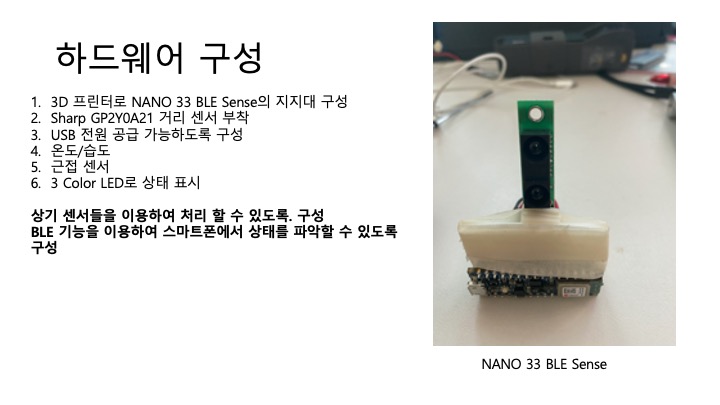
변수 및 라이브러리 설정
#include
#include
#include
int ledState = LOW;
unsigned long previousMillis = 0;
const long intervalLong = 1000;
const long intervalMed = 500;
const long intervalShort = 100;
float old_temp = 0;
float old_hum = 0;
long sensorsum = 0;
int n = 1;
int mean = 0;
int lastmean = 0;
// buffer to read samples into, each sample is 16-bits
short sampleBuffer[256];
// number of samples read
volatile int samplesRead;
센서 셋업
// The setup routine runs once when you press reset:
void setup() {
// Sets pin 13 for output in order to blink the LED:
pinMode(13, OUTPUT);
// Initialize serial communication at 9600 bits per second:
Serial.begin(9600);
if (!HTS.begin()) {
Serial.println("Failed to initialize humidity temperature sensor!");
while (1);
}
// configure the data receive callback
PDM.onReceive(onPDMdata);
// optionally set the gain, defaults to 20
// PDM.setGain(30);
// initialize PDM with:
// - one channel (mono mode)
// - a 16 kHz sample rate
if (!PDM.begin(1, 16000)) {
Serial.println("Failed to start PDM!");
while (1);
}
if (!APDS.begin()) {
Serial.println("Error initializing APDS9960 sensor!");
}
}
주 센서 처리 루틴
// The loop routine runs over and over again forever:
void loop() {
// Read the input on analog pin 0:
int sensorValue = analogRead(A0);
unsigned long currentMillis = millis();
delay(250);
// The "Mean" value will vary the whole loop beacuse it isalways calculating the mean with the read values
// The "Last Mean" value will only show the calculated mean value just to ease the reading of the calculated value
Serial.print(" sensorValue = ");
Serial.print(sensorValue);
Serial.print(" Last Mean = ");
Serial.println(lastmean);
delay(25);
// read all the sensor values
float temperature = HTS.readTemperature();
float humidity = HTS.readHumidity();
// check if the range values in temperature are bigger than 0,5 ºC
// and if the range values in humidity are bigger than 1%
if (abs(old_temp - temperature) >= 0.5 || abs(old_hum - humidity) >= 1 )
{
old_temp = temperature;
old_hum = humidity;
// print each of the sensor values
Serial.print("Temperature = ");
Serial.print(temperature);
Serial.println(" °C");
Serial.print("Humidity = ");
Serial.print(humidity);
Serial.println(" %");
Serial.println();
}
// print each of the sensor values
Serial.print("Temperature = ");
Serial.print(temperature);
Serial.println(" °C");
Serial.print("Humidity = ");
Serial.print(humidity);
Serial.println(" %");
// print an empty line
Serial.println();
/*
// wait for samples to be read
if (samplesRead) {
// print samples to the serial monitor or plotter
for (int i = 0; i < samplesRead; i++) {
Serial.println(sampleBuffer[i]);
// check if the sound value is higher than 500
if (sampleBuffer[i]>=500){
digitalWrite(LEDR,LOW);
digitalWrite(LEDG,HIGH);
digitalWrite(LEDB,HIGH);
}
// check if the sound value is higher than 250 and lower than 500
if (sampleBuffer[i]>=250 && sampleBuffer[i] < 500){
digitalWrite(LEDB,LOW);
digitalWrite(LEDR,HIGH);
digitalWrite(LEDG,HIGH);
}
//check if the sound value is higher than 0 and lower than 250
if (sampleBuffer[i]>=0 && sampleBuffer[i] < 250){
digitalWrite(LEDG,LOW);
digitalWrite(LEDR,HIGH);
digitalWrite(LEDB,HIGH);
}
}
// clear the read count
samplesRead = 0;
}
*/
// check if a proximity reading is available
if (APDS.proximityAvailable()) {
// read the proximity
// - 0 => close
// - 255 => far
// - -1 => error
int proximity = APDS.readProximity();
if (proximity > 150) {
if (currentMillis - previousMillis >= intervalLong) {
previousMillis = currentMillis;
// if the LED is off turn it on and vice-versa:
if (ledState == LOW) {
ledState = HIGH;
} else {
ledState = LOW;
}
// set the green LED with the ledState of the variable and turn off the rest
digitalWrite(LEDG, ledState);
digitalWrite(LEDR, HIGH);
digitalWrite(LEDB, HIGH);
}
}
else if(proximity > 50 && proximity <= 150){
if (currentMillis - previousMillis >= intervalMed) {
previousMillis = currentMillis;
// if the LED is off turn it on and vice-versa:
if (ledState == LOW) {
ledState = HIGH;
} else {
ledState = LOW;
}
// set the blue LED with the ledState of the variable and turn off the rest
digitalWrite(LEDB, ledState);
digitalWrite(LEDR, HIGH);
digitalWrite(LEDG, HIGH);
}
}
else {
if (currentMillis - previousMillis >= intervalShort) {
previousMillis = currentMillis;
// if the LED is off turn it on and vice-versa:
if (ledState == LOW) {
ledState = HIGH;
} else {
ledState = LOW;
}
// set the blue LED with the ledState of the variable and turn off the rest
digitalWrite(LEDR, ledState);
digitalWrite(LEDB, HIGH);
digitalWrite(LEDG, HIGH);
}
}
// print value to the Serial Monitor
Serial.println(proximity);
}
}
void onPDMdata() {
// query the number of bytes available
int bytesAvailable = PDM.available();
// read into the sample buffer
PDM.read(sampleBuffer, bytesAvailable);
// 16-bit, 2 bytes per sample
samplesRead = bytesAvailable / 2;
}
Quest 4: 학습 자세 도우미 프로젝트
2022.07.03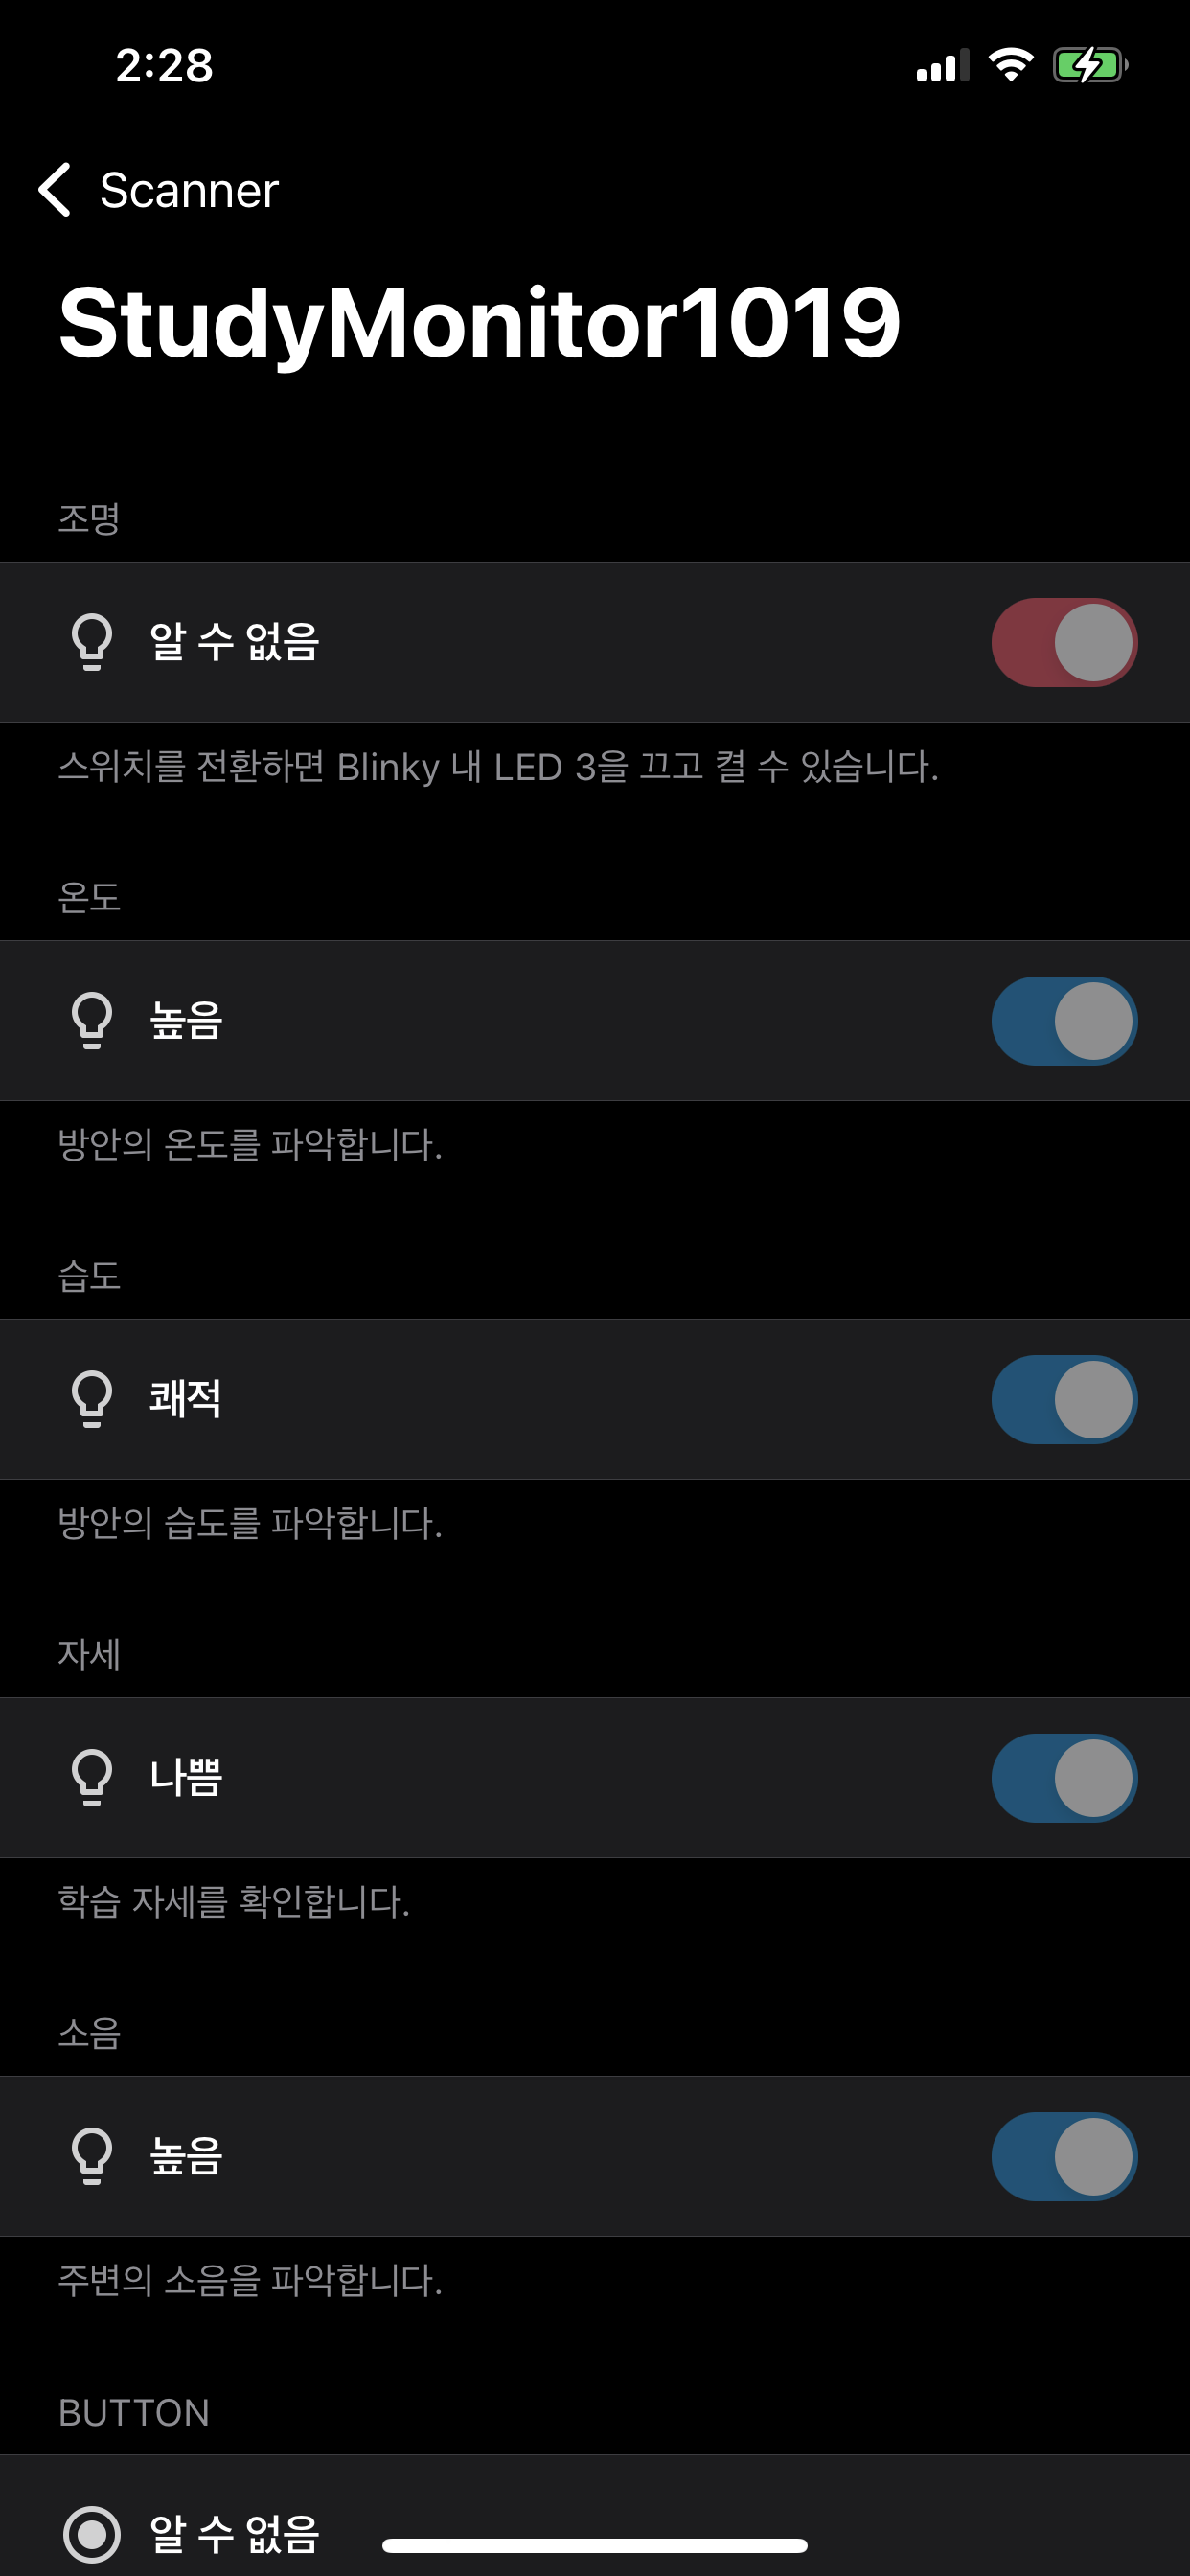
학습 모니터 최종 개발 동영상을 올립니다.
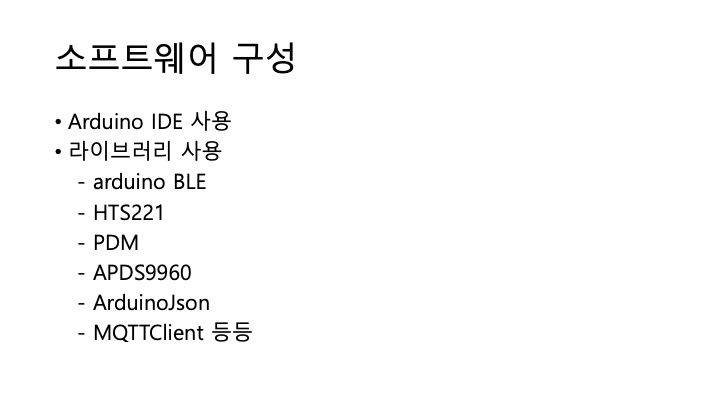
1. Arduino Nano 33 BLE sense 및 아이폰 앱을 구성하였습니다.
2. 소프트웨어의 전체적인 구성은 다음과 같습니다.
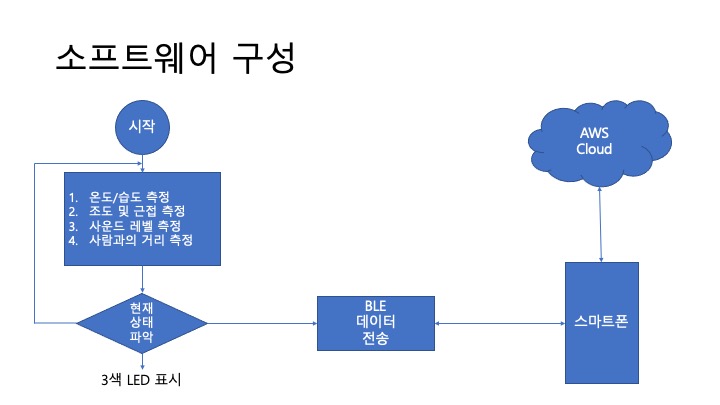
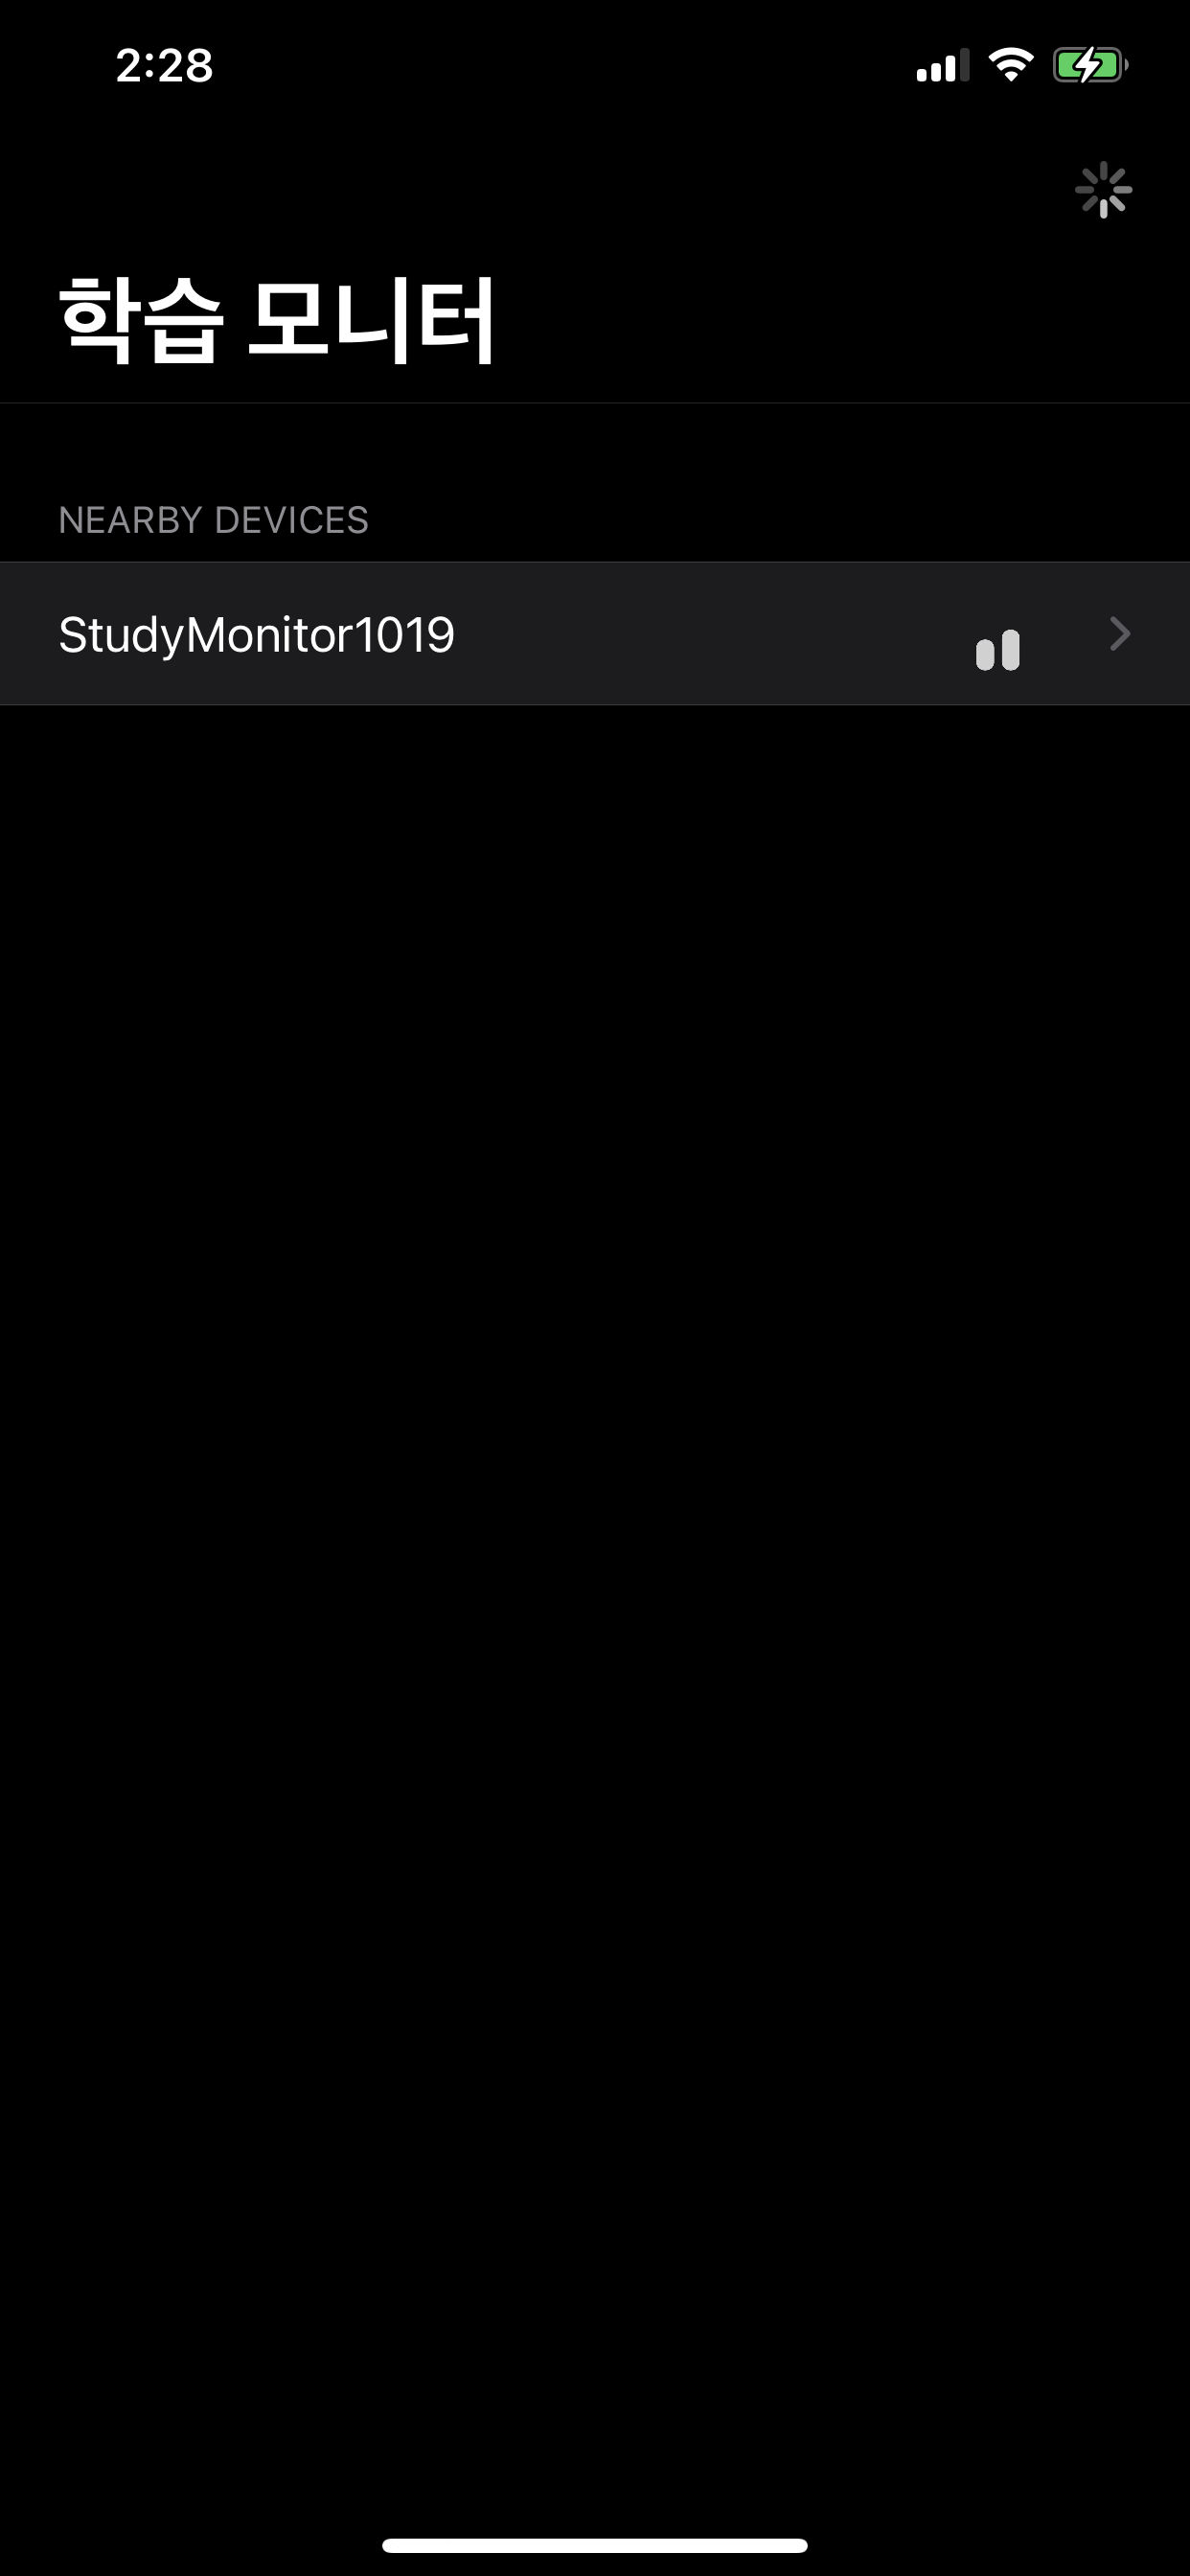
3. BLE 기능을 사용하여 아이폰과 연결할 수 있는 앱을 만들었습니다.
4. StudyMonitor로 장치 이름을 설정하고 아이폰에서 장치를 찾는 그림입니다.
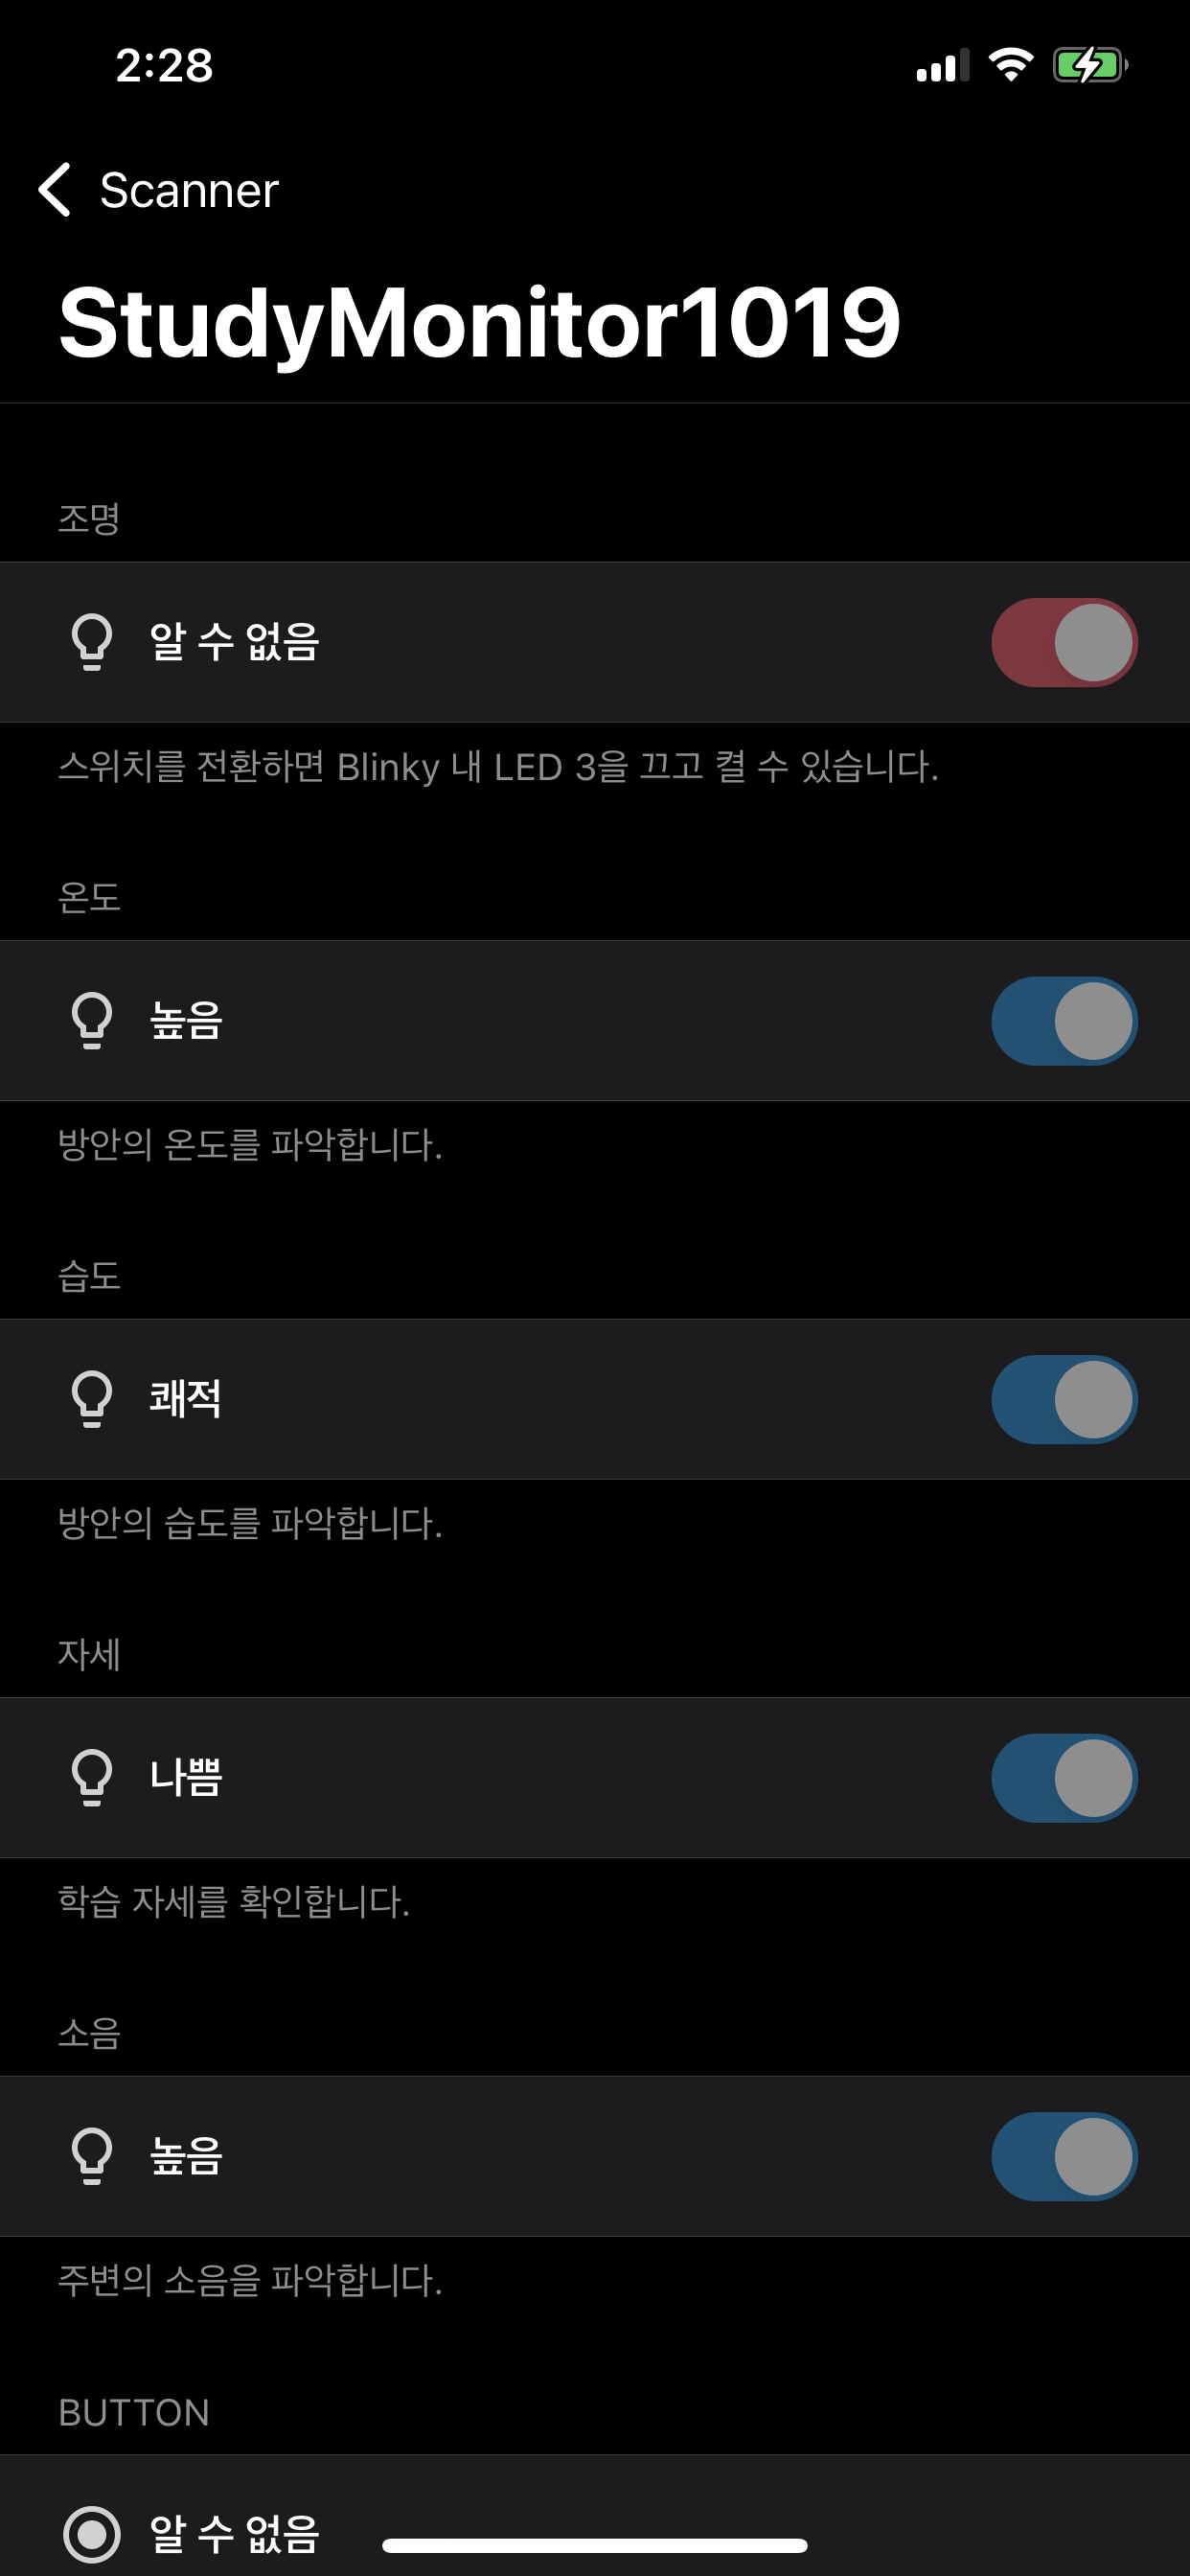
5. 실시간 현재 방안의 상태 및 자세를 모니터링 할 수 있도록 UI를 구성하였습니다.
6. 개발 내용 전체를 담은 동영상의 파일명이 깨저서 나오네요(맥에서 올려서).
7. 동영상을 통해 전제 동작 내용을 확인해 주세요.
8. 틈틈이 하다 보니 UI 및 프로그램이 부족한 부분이 많습니다.
9. 실시간 온도/습도/조도/자세를 모니터링 하는 부분에 집중하였습니다.
10. 기회가 된다면 좀 더 안정적으로 펌웨어 및 앱을 개발하도록 하겠습니다.
감사합니다.
프로젝트 갤러리
프로젝트 제작 과정과 최종 결과물을 담은 이미지 갤러리입니다.
프로젝트 소개
사용 기술
댓글 0개
아직 댓글이 없습니다. 첫 댓글을 남겨보세요!